[Blender] arch4e's add-ons usage
Overview
This article compiles the usage instructions for custom add-ons, detailing the operating environment for each add-on separately. As it may not be fully compatible with the latest release, please refer to GitHub release notes or similar sources for changes beyond the specified version.
For inquiries and tool creation requests, please check the end of the article.
Add-on Usage
bpgrip
Main Features
- Register keyboard shortcuts for switching blending modes of brush-type tools
Usage (Assuming Weight Paint Mode)
Tested on: bpgrip v2.0 / Blender 3.6.5 It should also work on Blender 4.0, the latest version at the time of writing.
- Go to
Edit >> Preferencesfrom the top left of the screen and navigate to Keymap.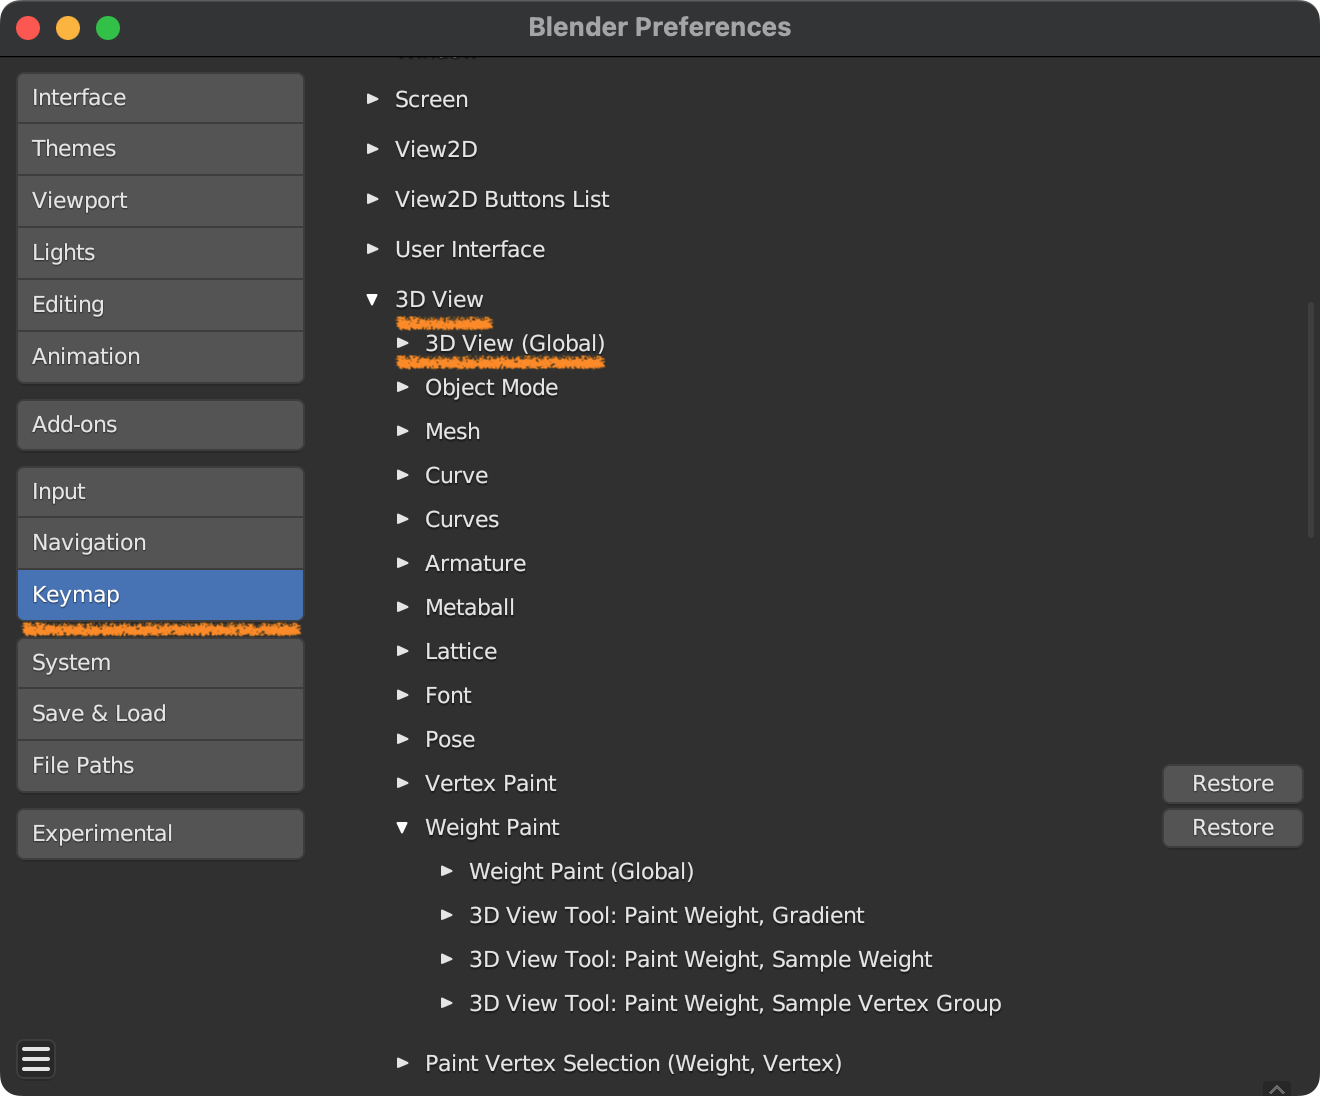
- Scroll down a bit and go to
3D View >> Weight Paint >> Weight Paint (Global)(※1).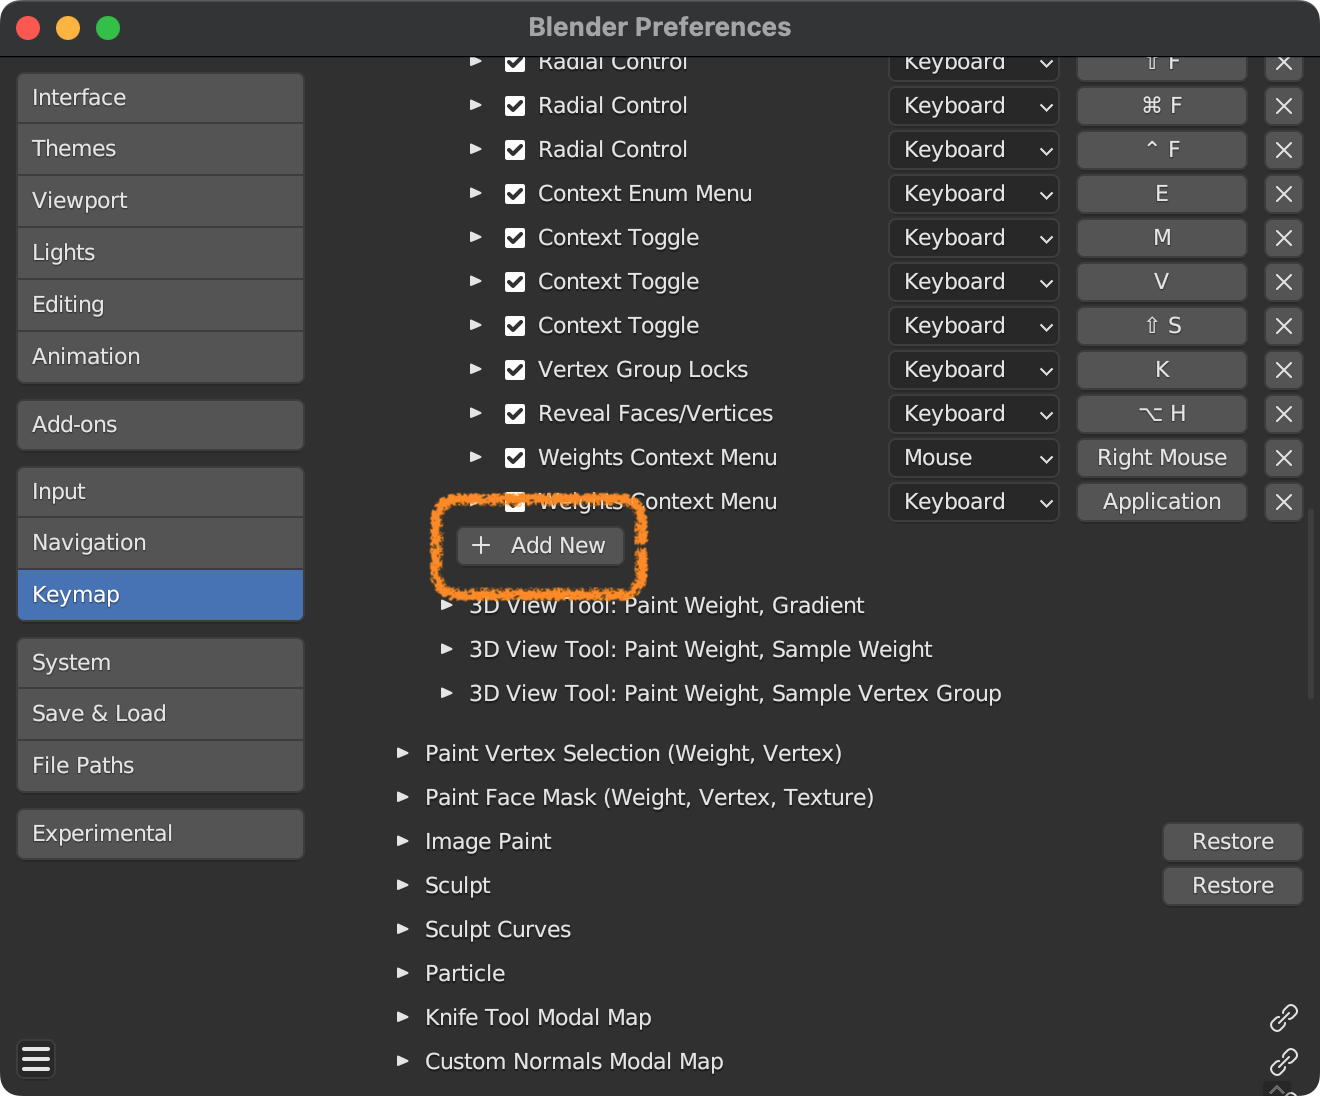
- Press
Add New, then press the triangle icon.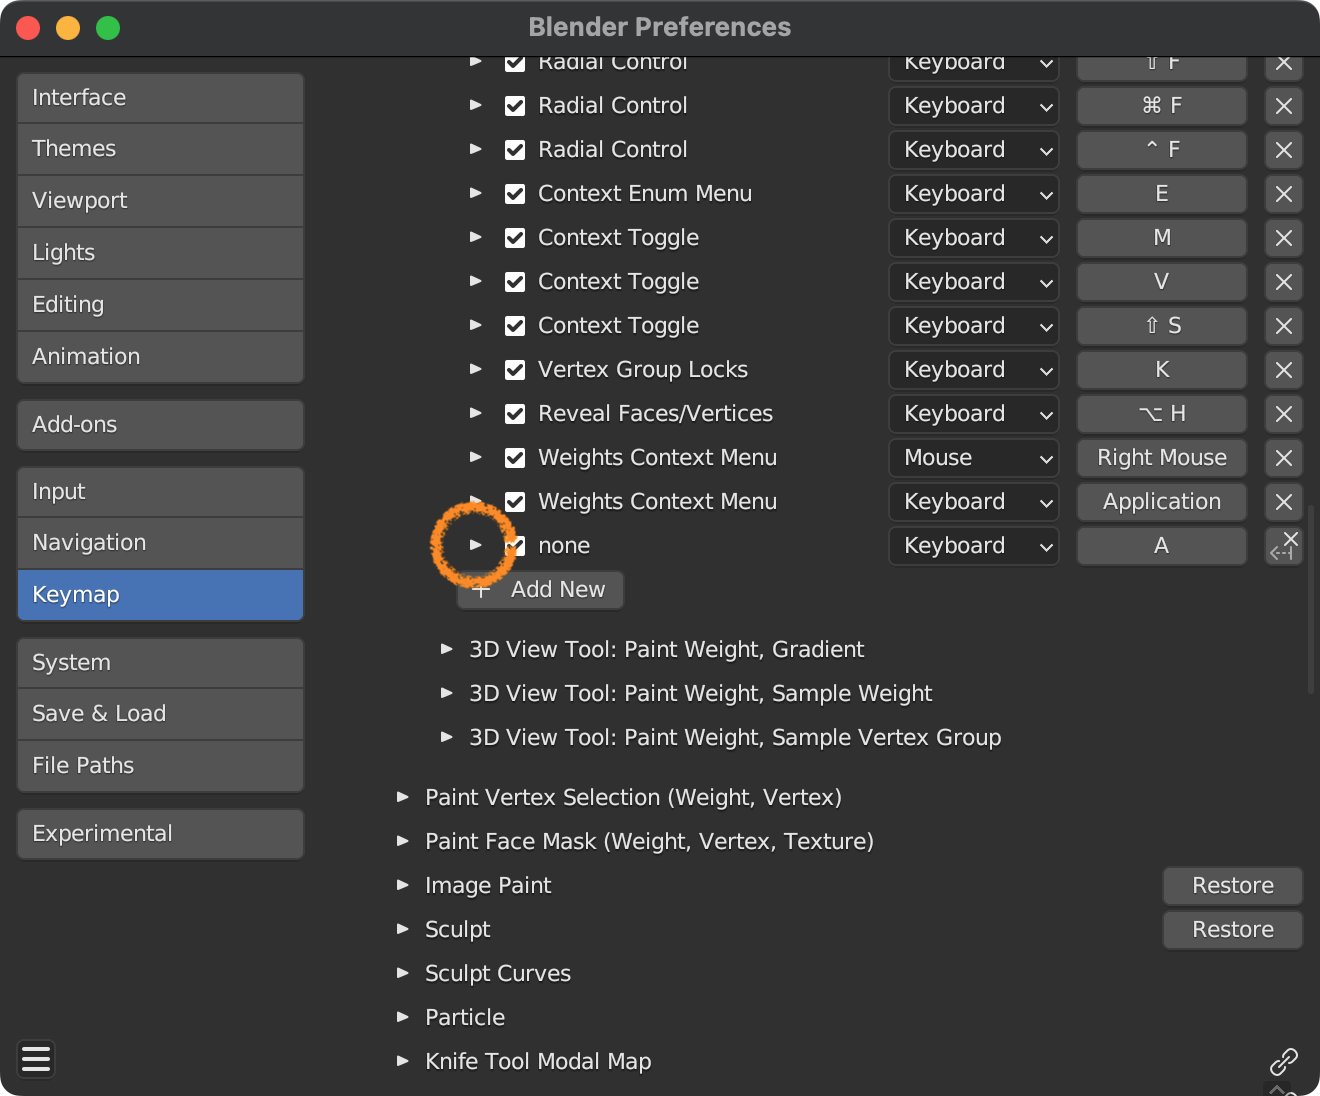
- Change the entry that says
nonetobpgrip.set_bbmode, and assign the keyboard shortcut.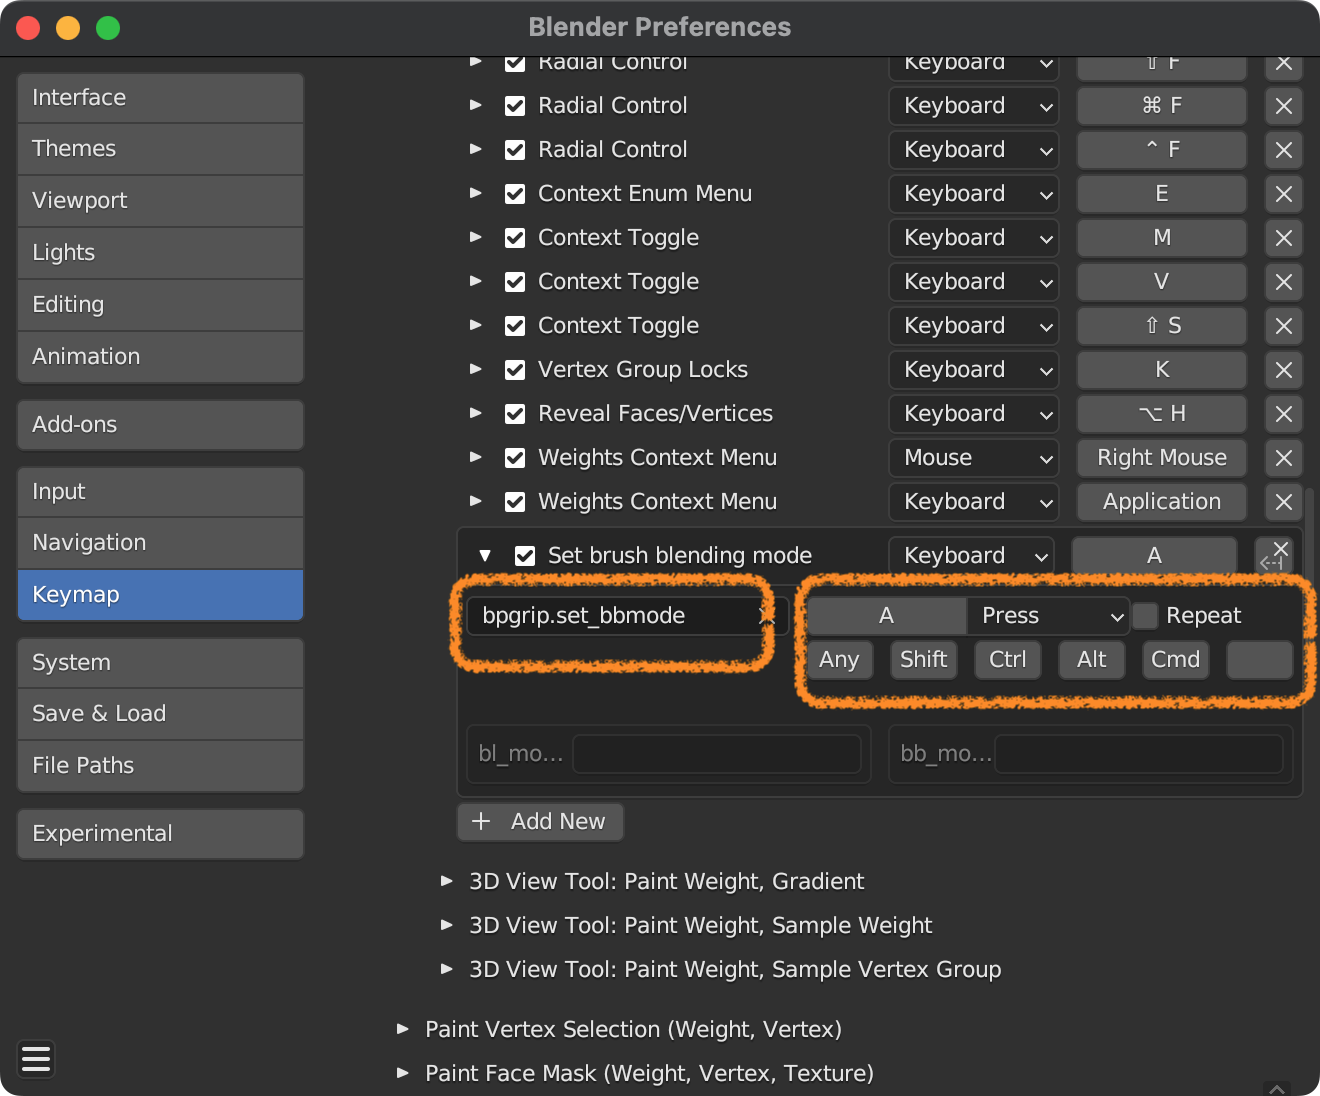
- Set the
bl_modetoDraw(※2) and thebb_modeto the tool you want to assign the shortcut (※3).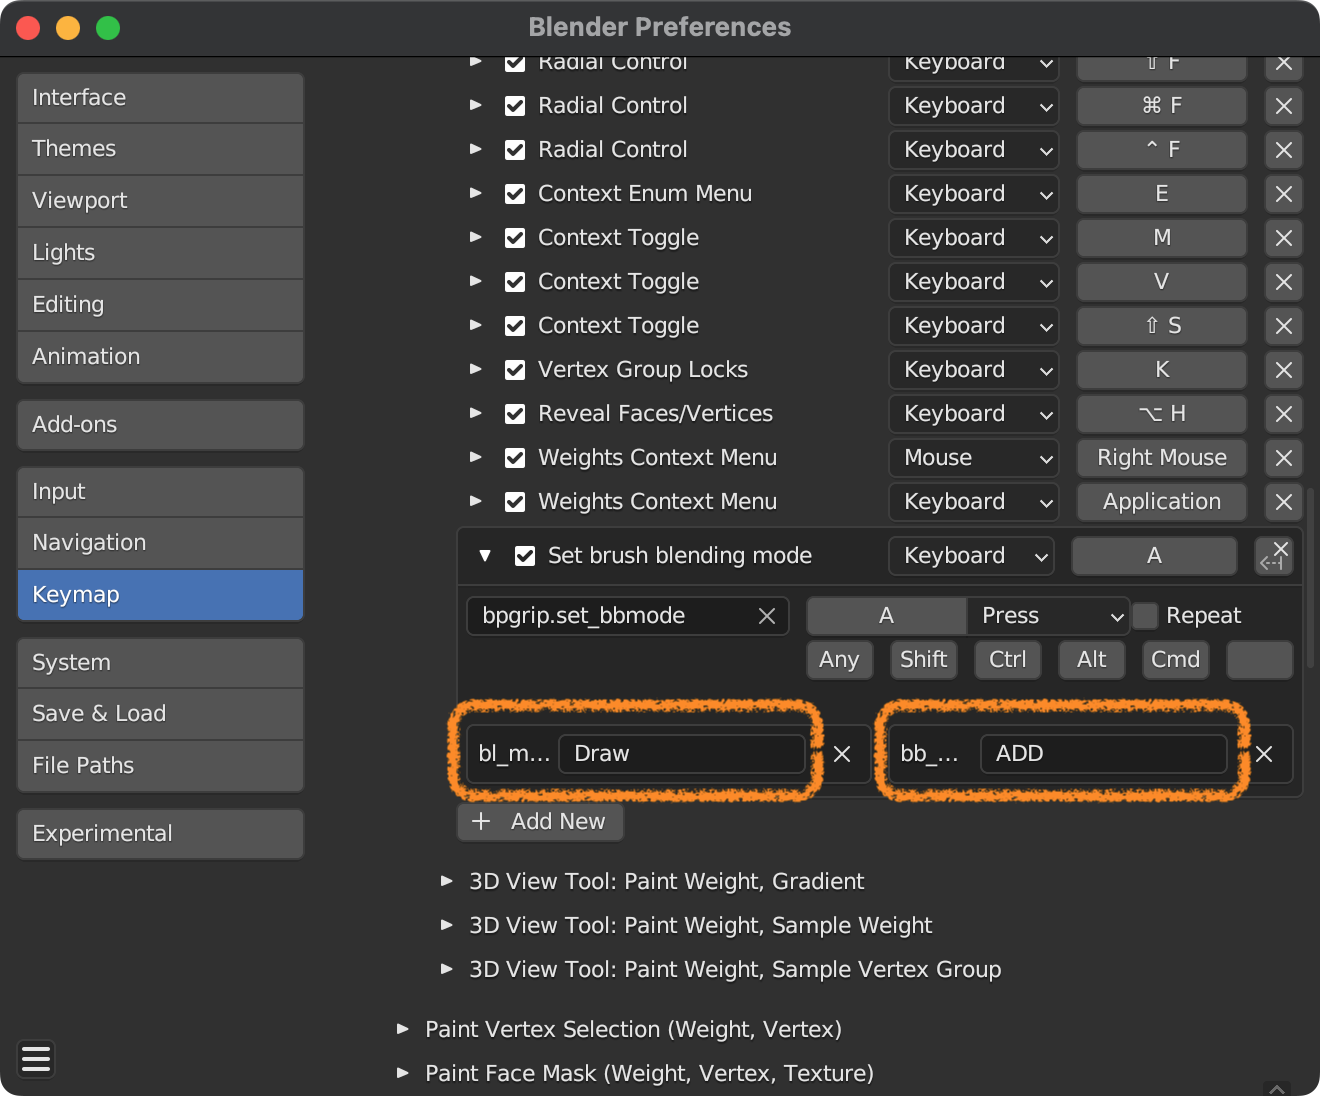
- With these steps, you can switch Brush Blending Modes using the keyboard shortcut.
※1,2: For brush tools in Sculpt Mode and similar, refer to the "Keymap" section in the "readme.md" on GitHub.
       https://github.com/arch4e/bpgrip
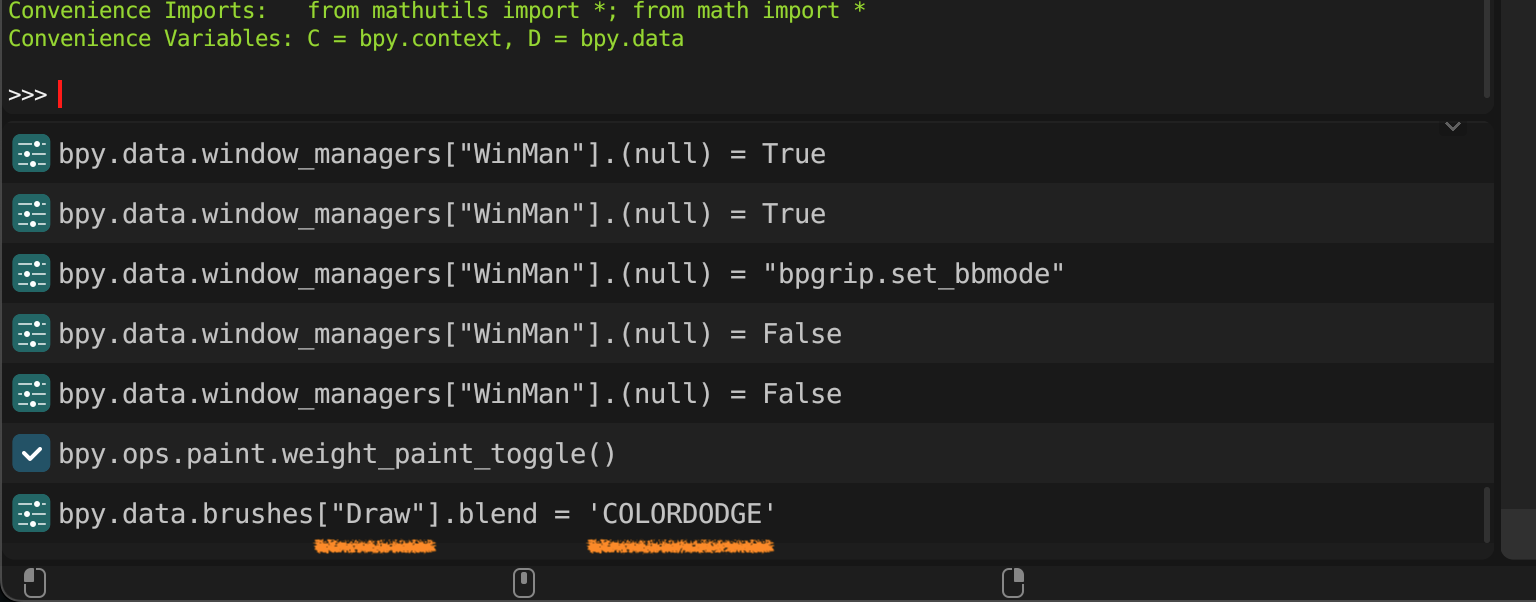
※3: Basic tool names are usually straightforward, such as "Add" for the "ADD" brush. You can also check from the Inspector at the bottom left of Blender's "Scripting" tab, which shows the operation log. Also, the `bl_mode` in ※2 can be confirmed in a similar log.
lab04
Download: GitHub
Main Features
※Implements various small functions not substantial enough to be a separate add-on, and relatively frequently conducts feature integration and removal.
- Match mesh names with object names
- Rename vertex groups in bulk (with regular expression)
- Toggle
UV Sync Selection, allowing other UV maps to remain visible while disabled - Assist in assigning weights to vertex groups
Perform simple tasks by instructing ChatGPT (joke feature)Deprecated in v0.5.0
Usage
Tested on: bpgrip v2.0 / Blender 3.6.5, 4.0.0
Match Mesh Names with Object Names
- 3D Viewの右にある
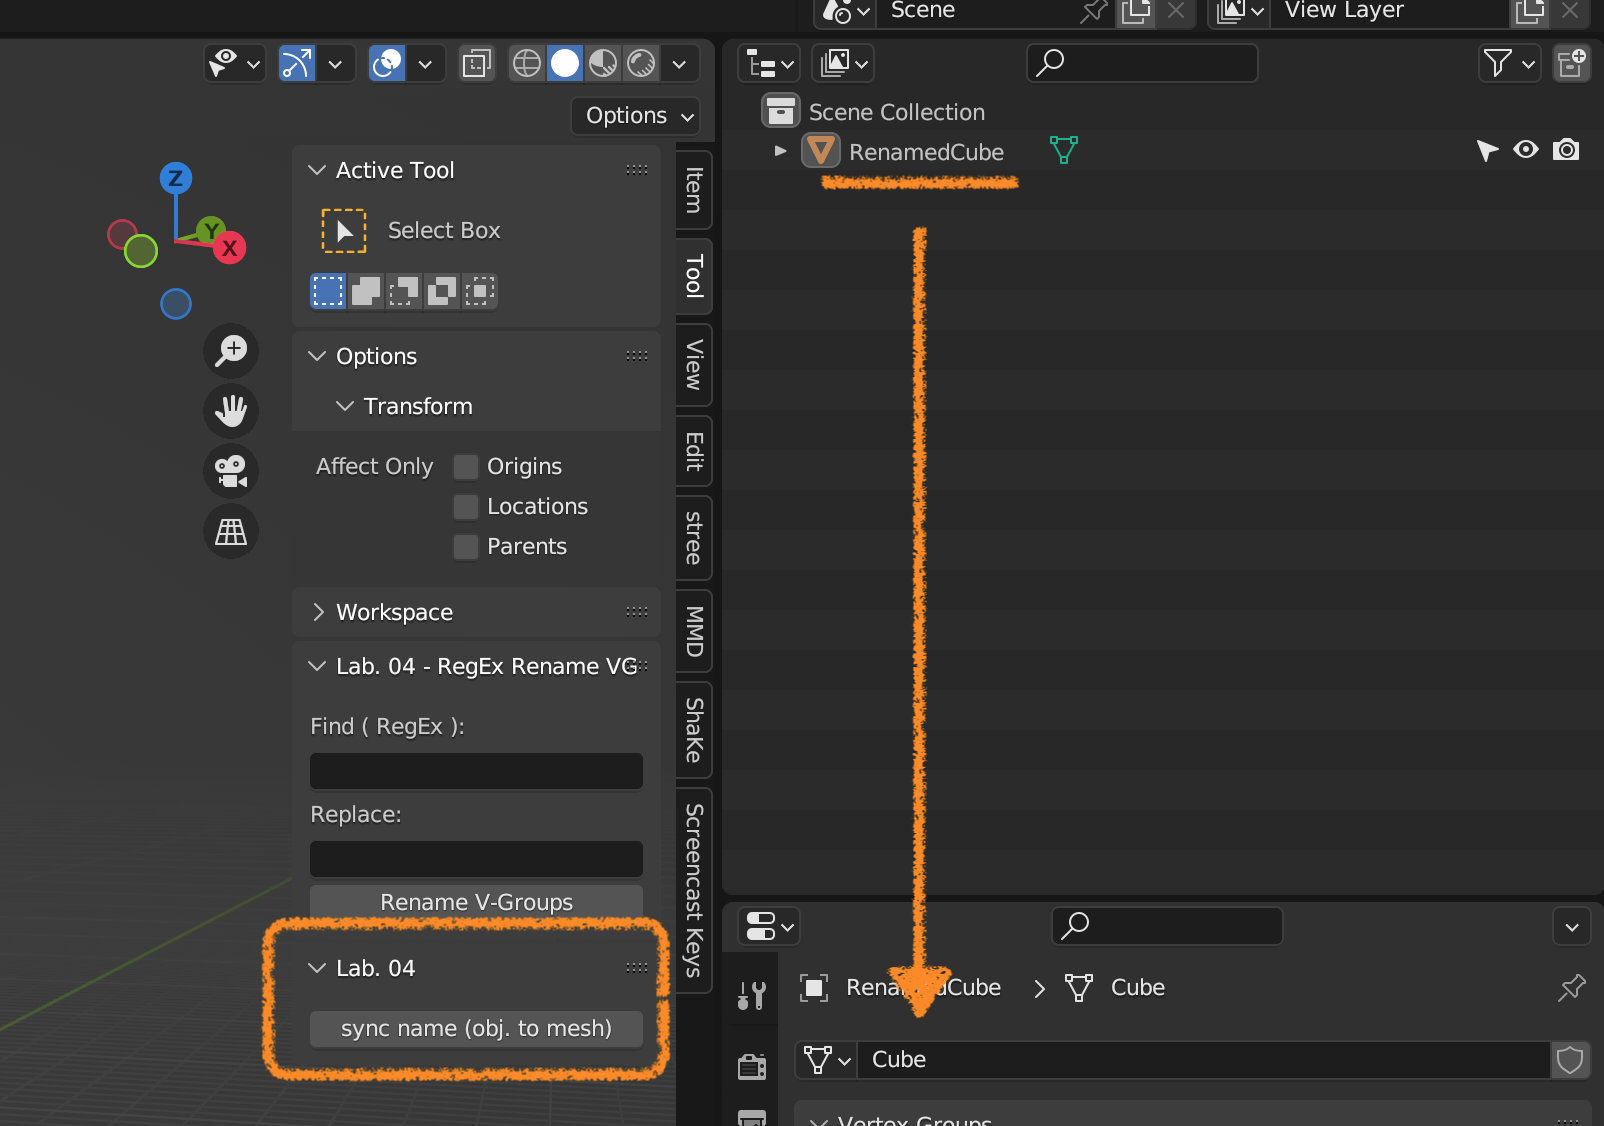
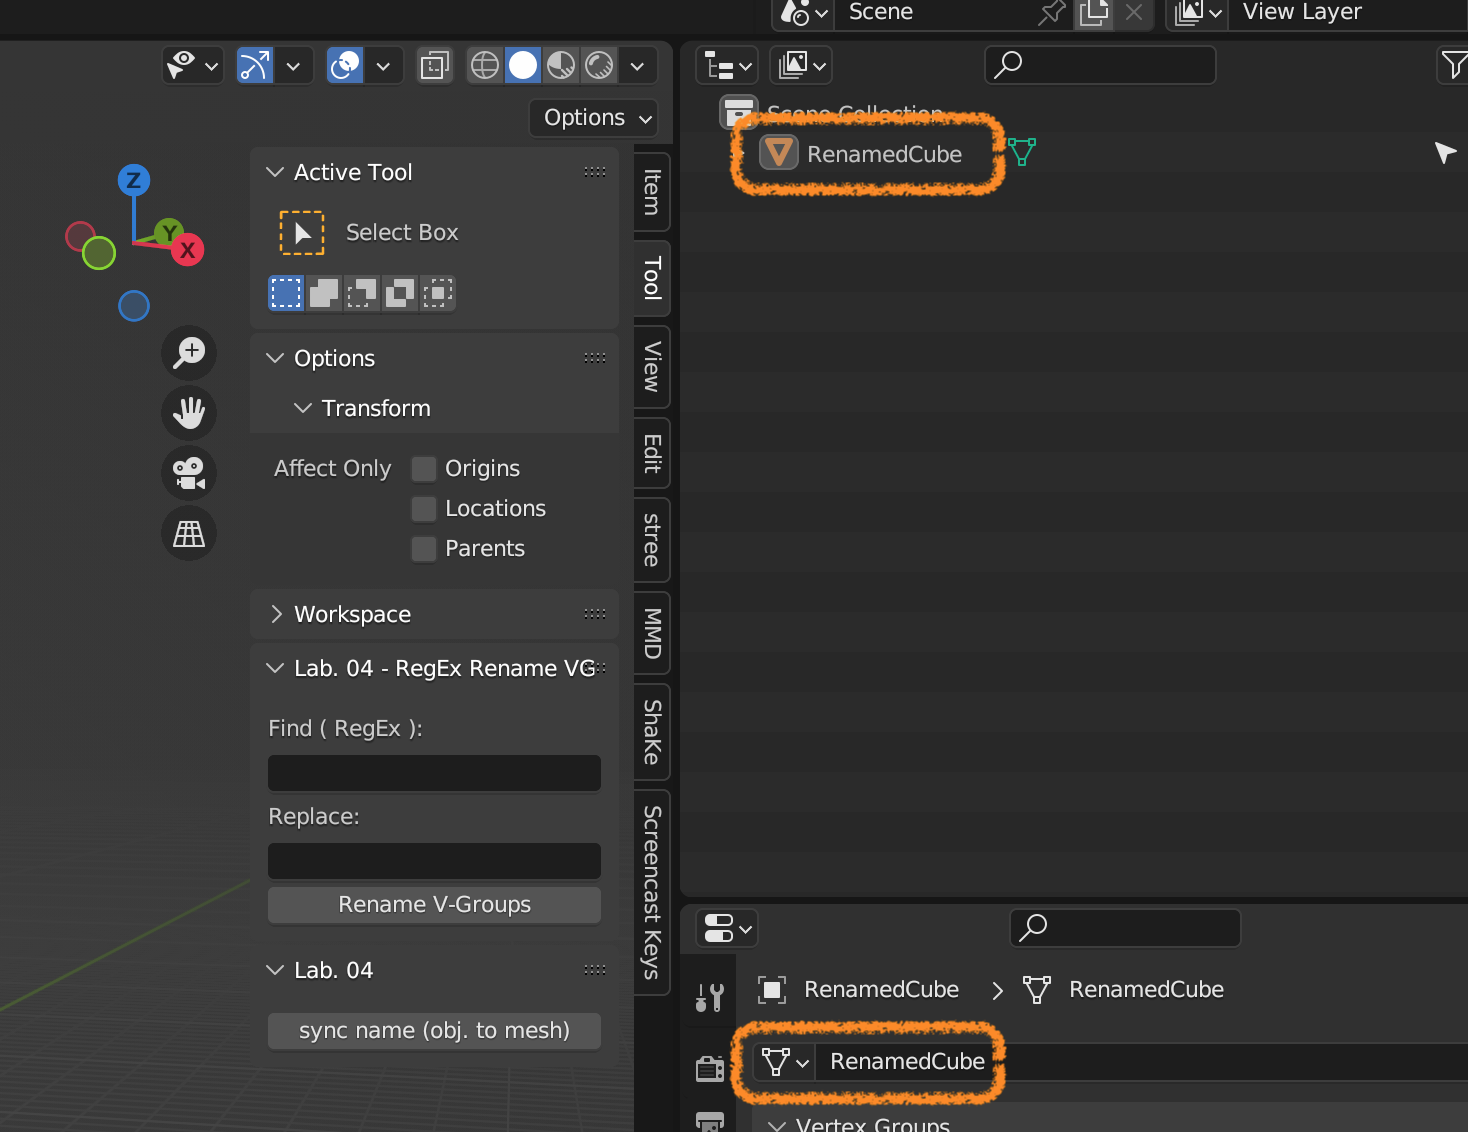
ToolエリアからLab. 04パネルを開く sync name (obj. to mesh)ボタンを押すと全てのメッシュの名前がObjectの名前で上書きされる- Open the
Lab. 04panel from theToolarea on the right side of the 3D View. - Press the
sync name (obj. to mesh)button to overwrite all mesh names with object names.
Rename Vertex Groups in Bulk (with Regular Expression)
- Select and make active the object you want to operate on.
- Enter the search pattern and replacement string, then press
Rename V-Groups.- The pattern is interpreted as a regular expression, so you can use it to add a prefix by specifying ^ (meaning “start of line” in regular expressions).


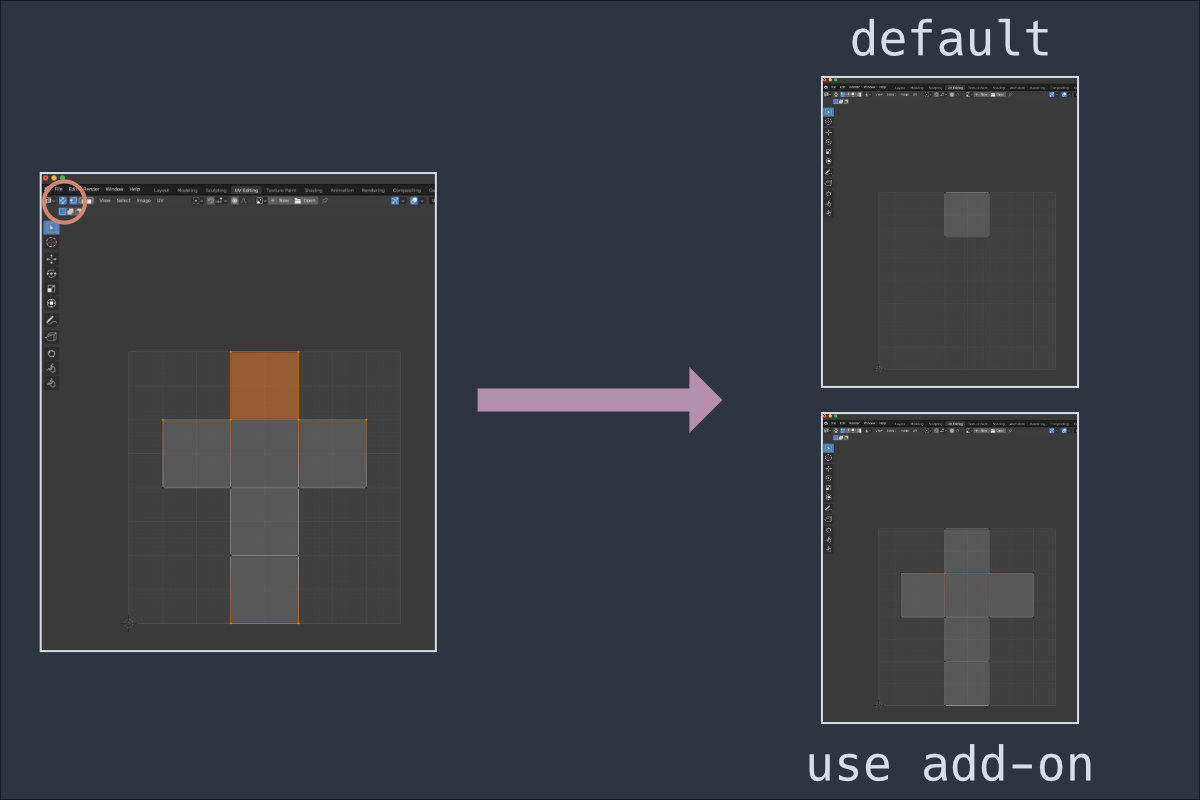
Toggle UV Sync Selection , Allowing Other UV Maps to Remain Visible While Disabled
- Go to
Edit >> Preferencesfrom the top left of the screen and navigate toKeymap. - Scroll down a bit and go to
Image >> UV Editor >> UV Editor (Global).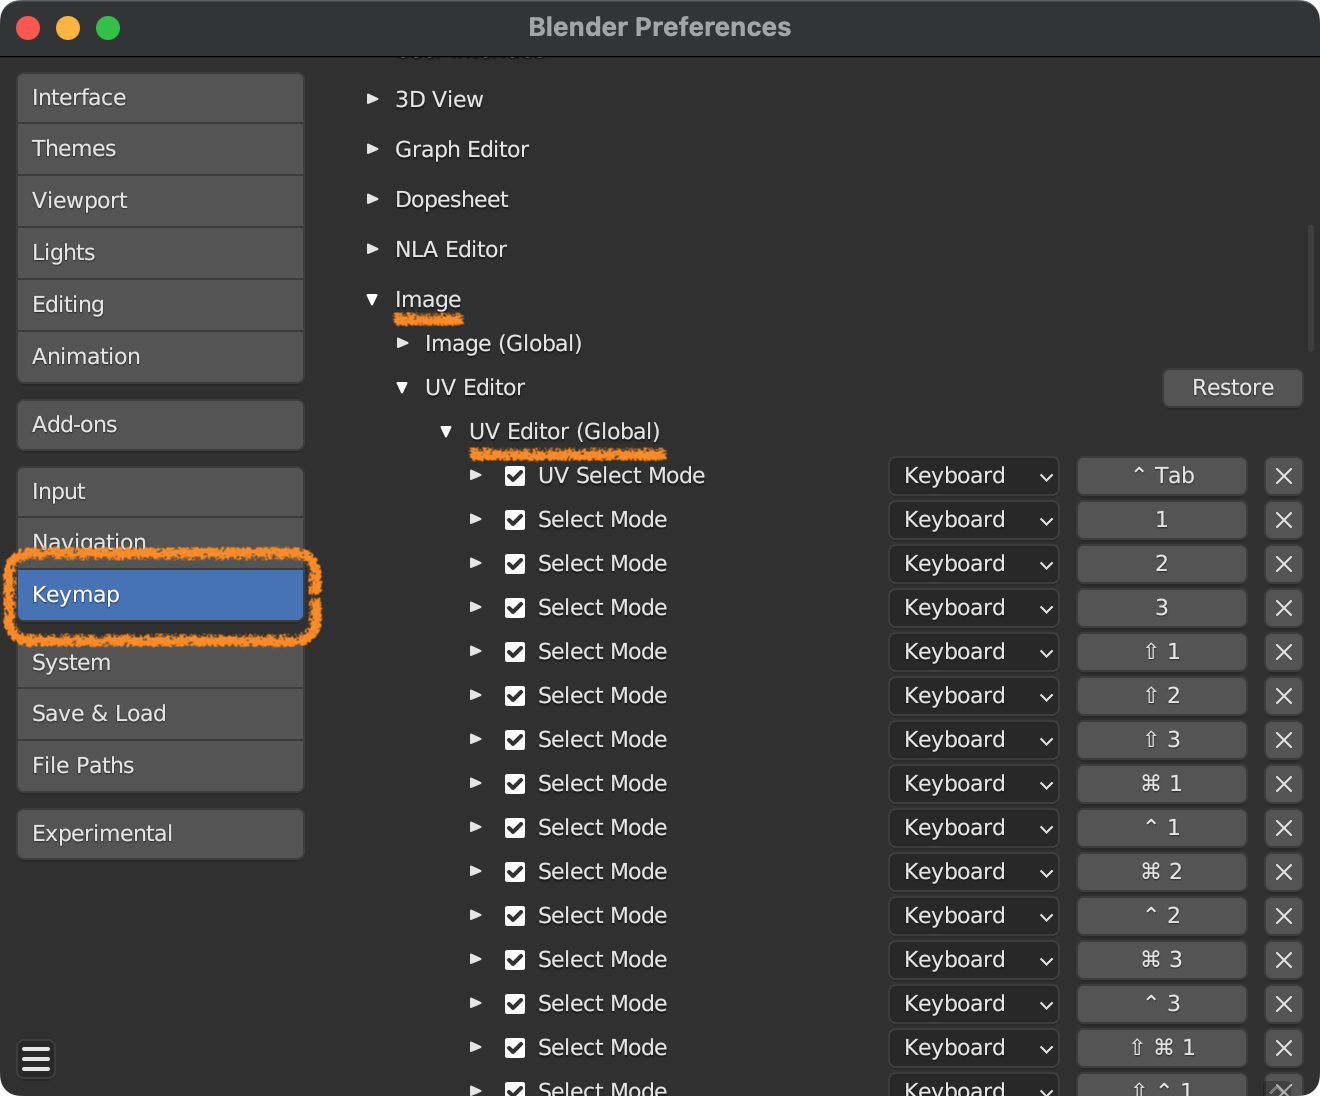
- Similar to bpgrip, assign a keyboard shortcut to
lab04.switch_uv_select_syncusingAdd New.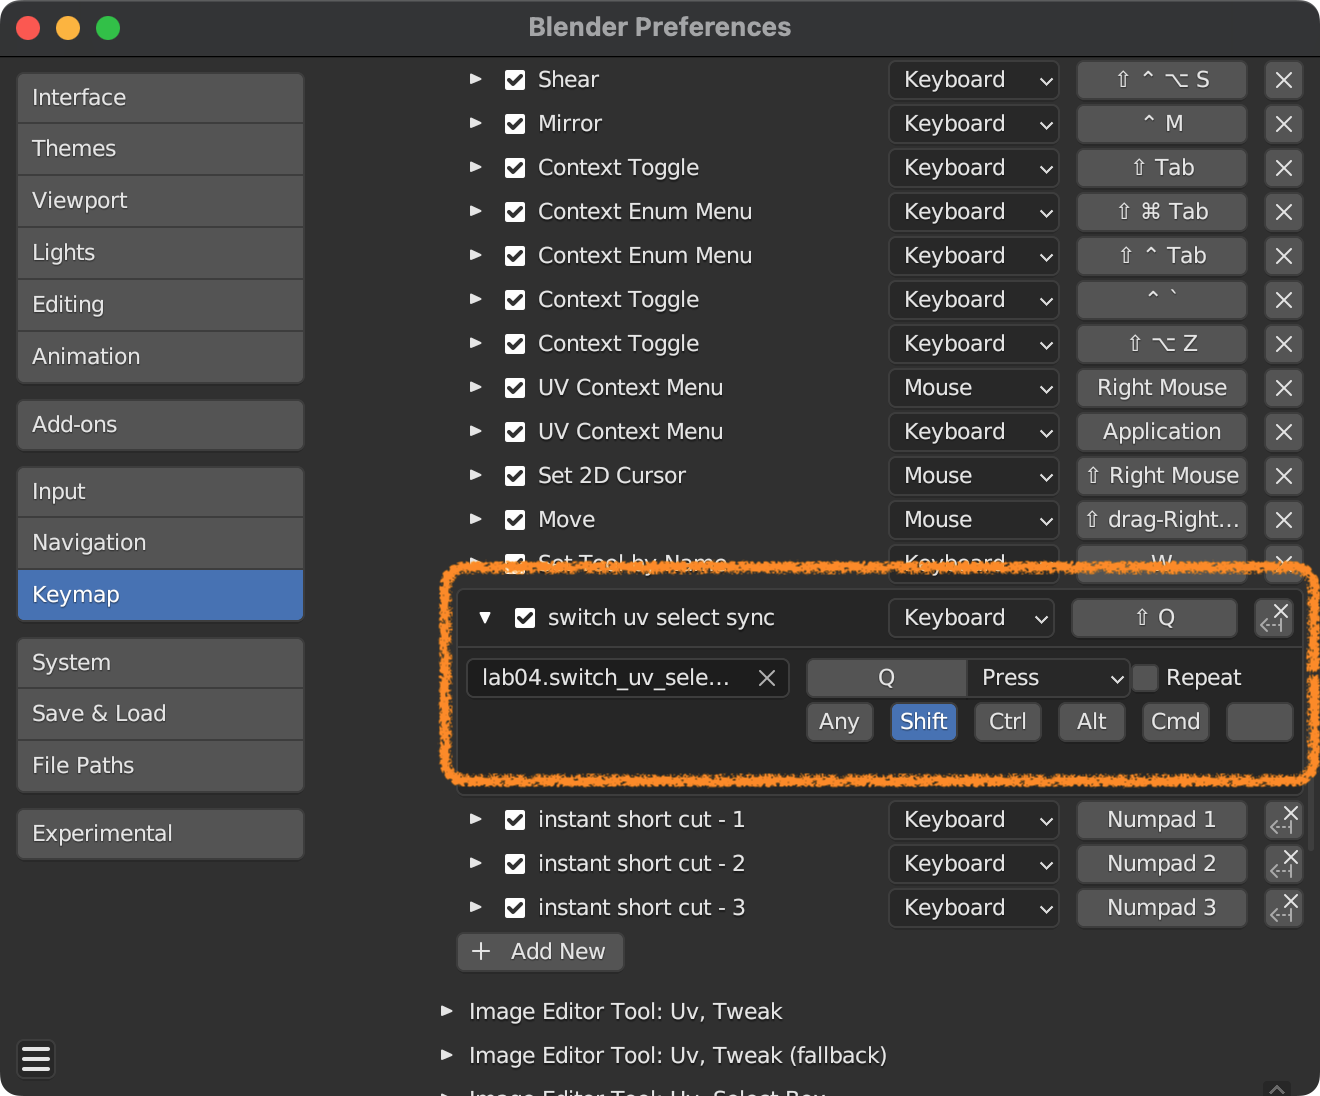
- Execute the set keyboard shortcut in the UV Editing tab to toggle
UV Sync Selection.
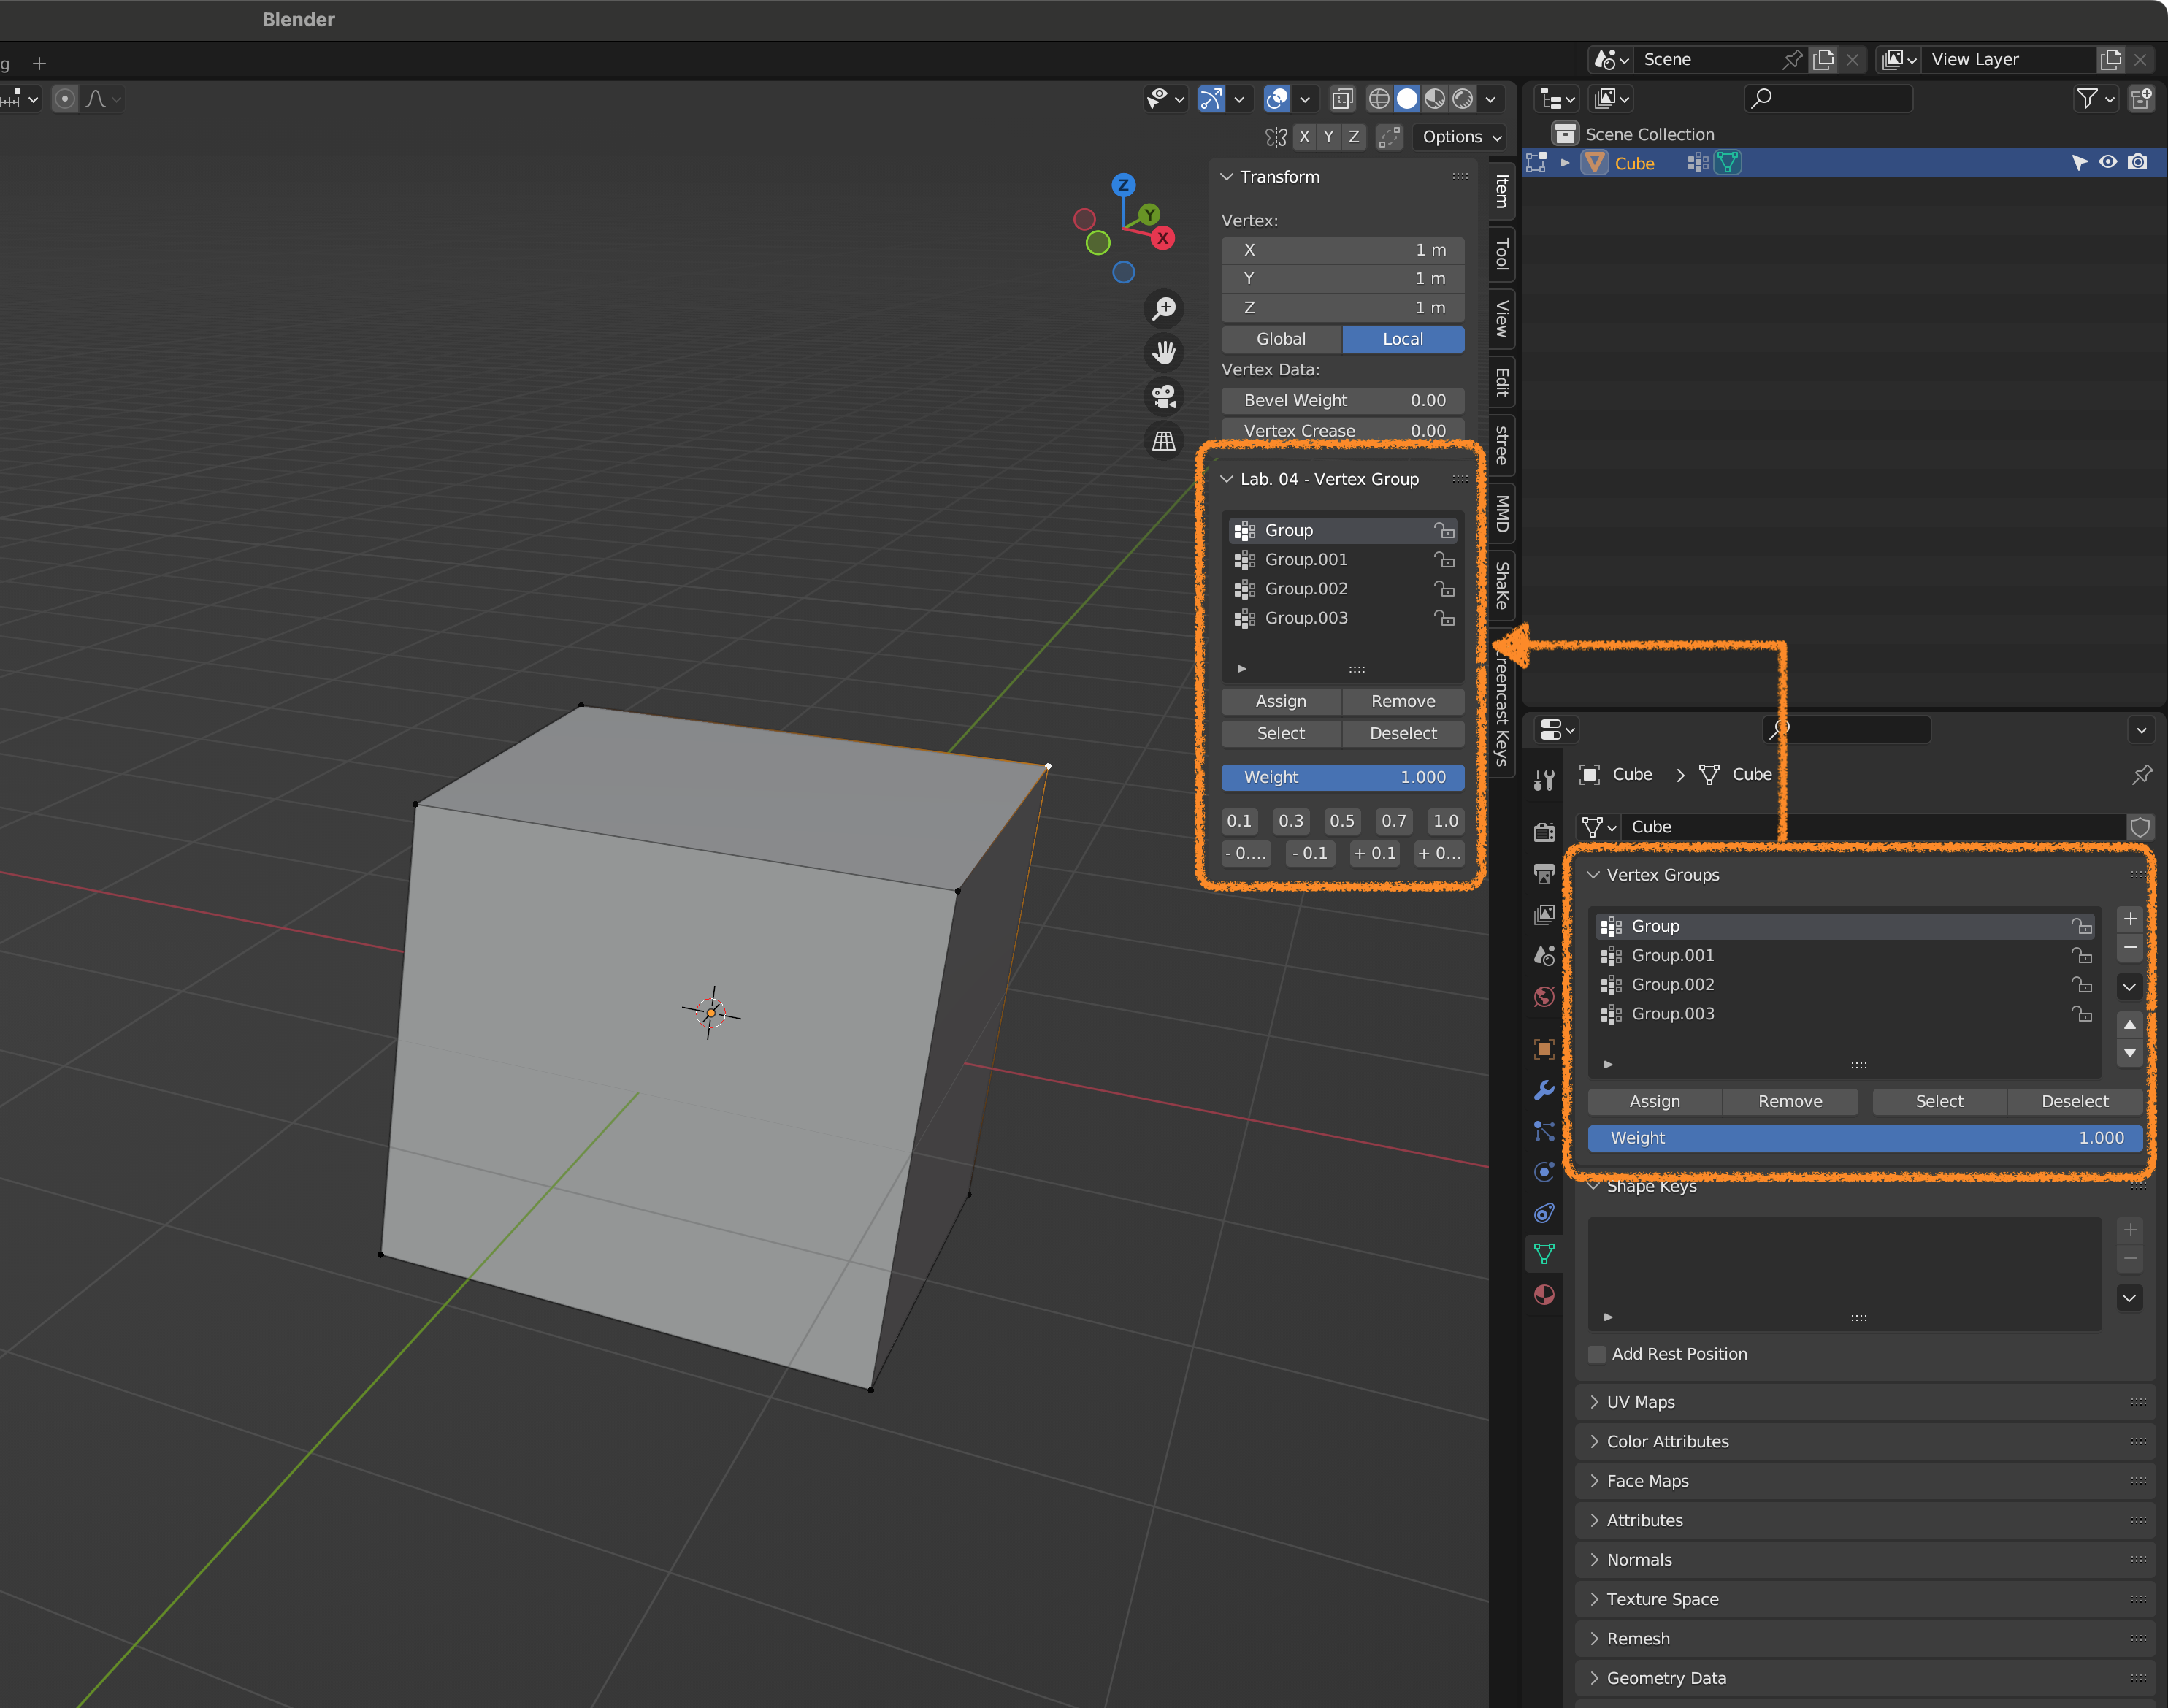
Assist in Assigning Weights to Vertex Groups
A panel for assigning weights to vertex groups appears in the Item area.
Although it’s essentially the same as the default functionality, it allows specifying weight values with the mouse cursor. Note that the application of weights is triggered when the Assign button is pressed.
shake
Main Features
- Create Shape Keys from CSV
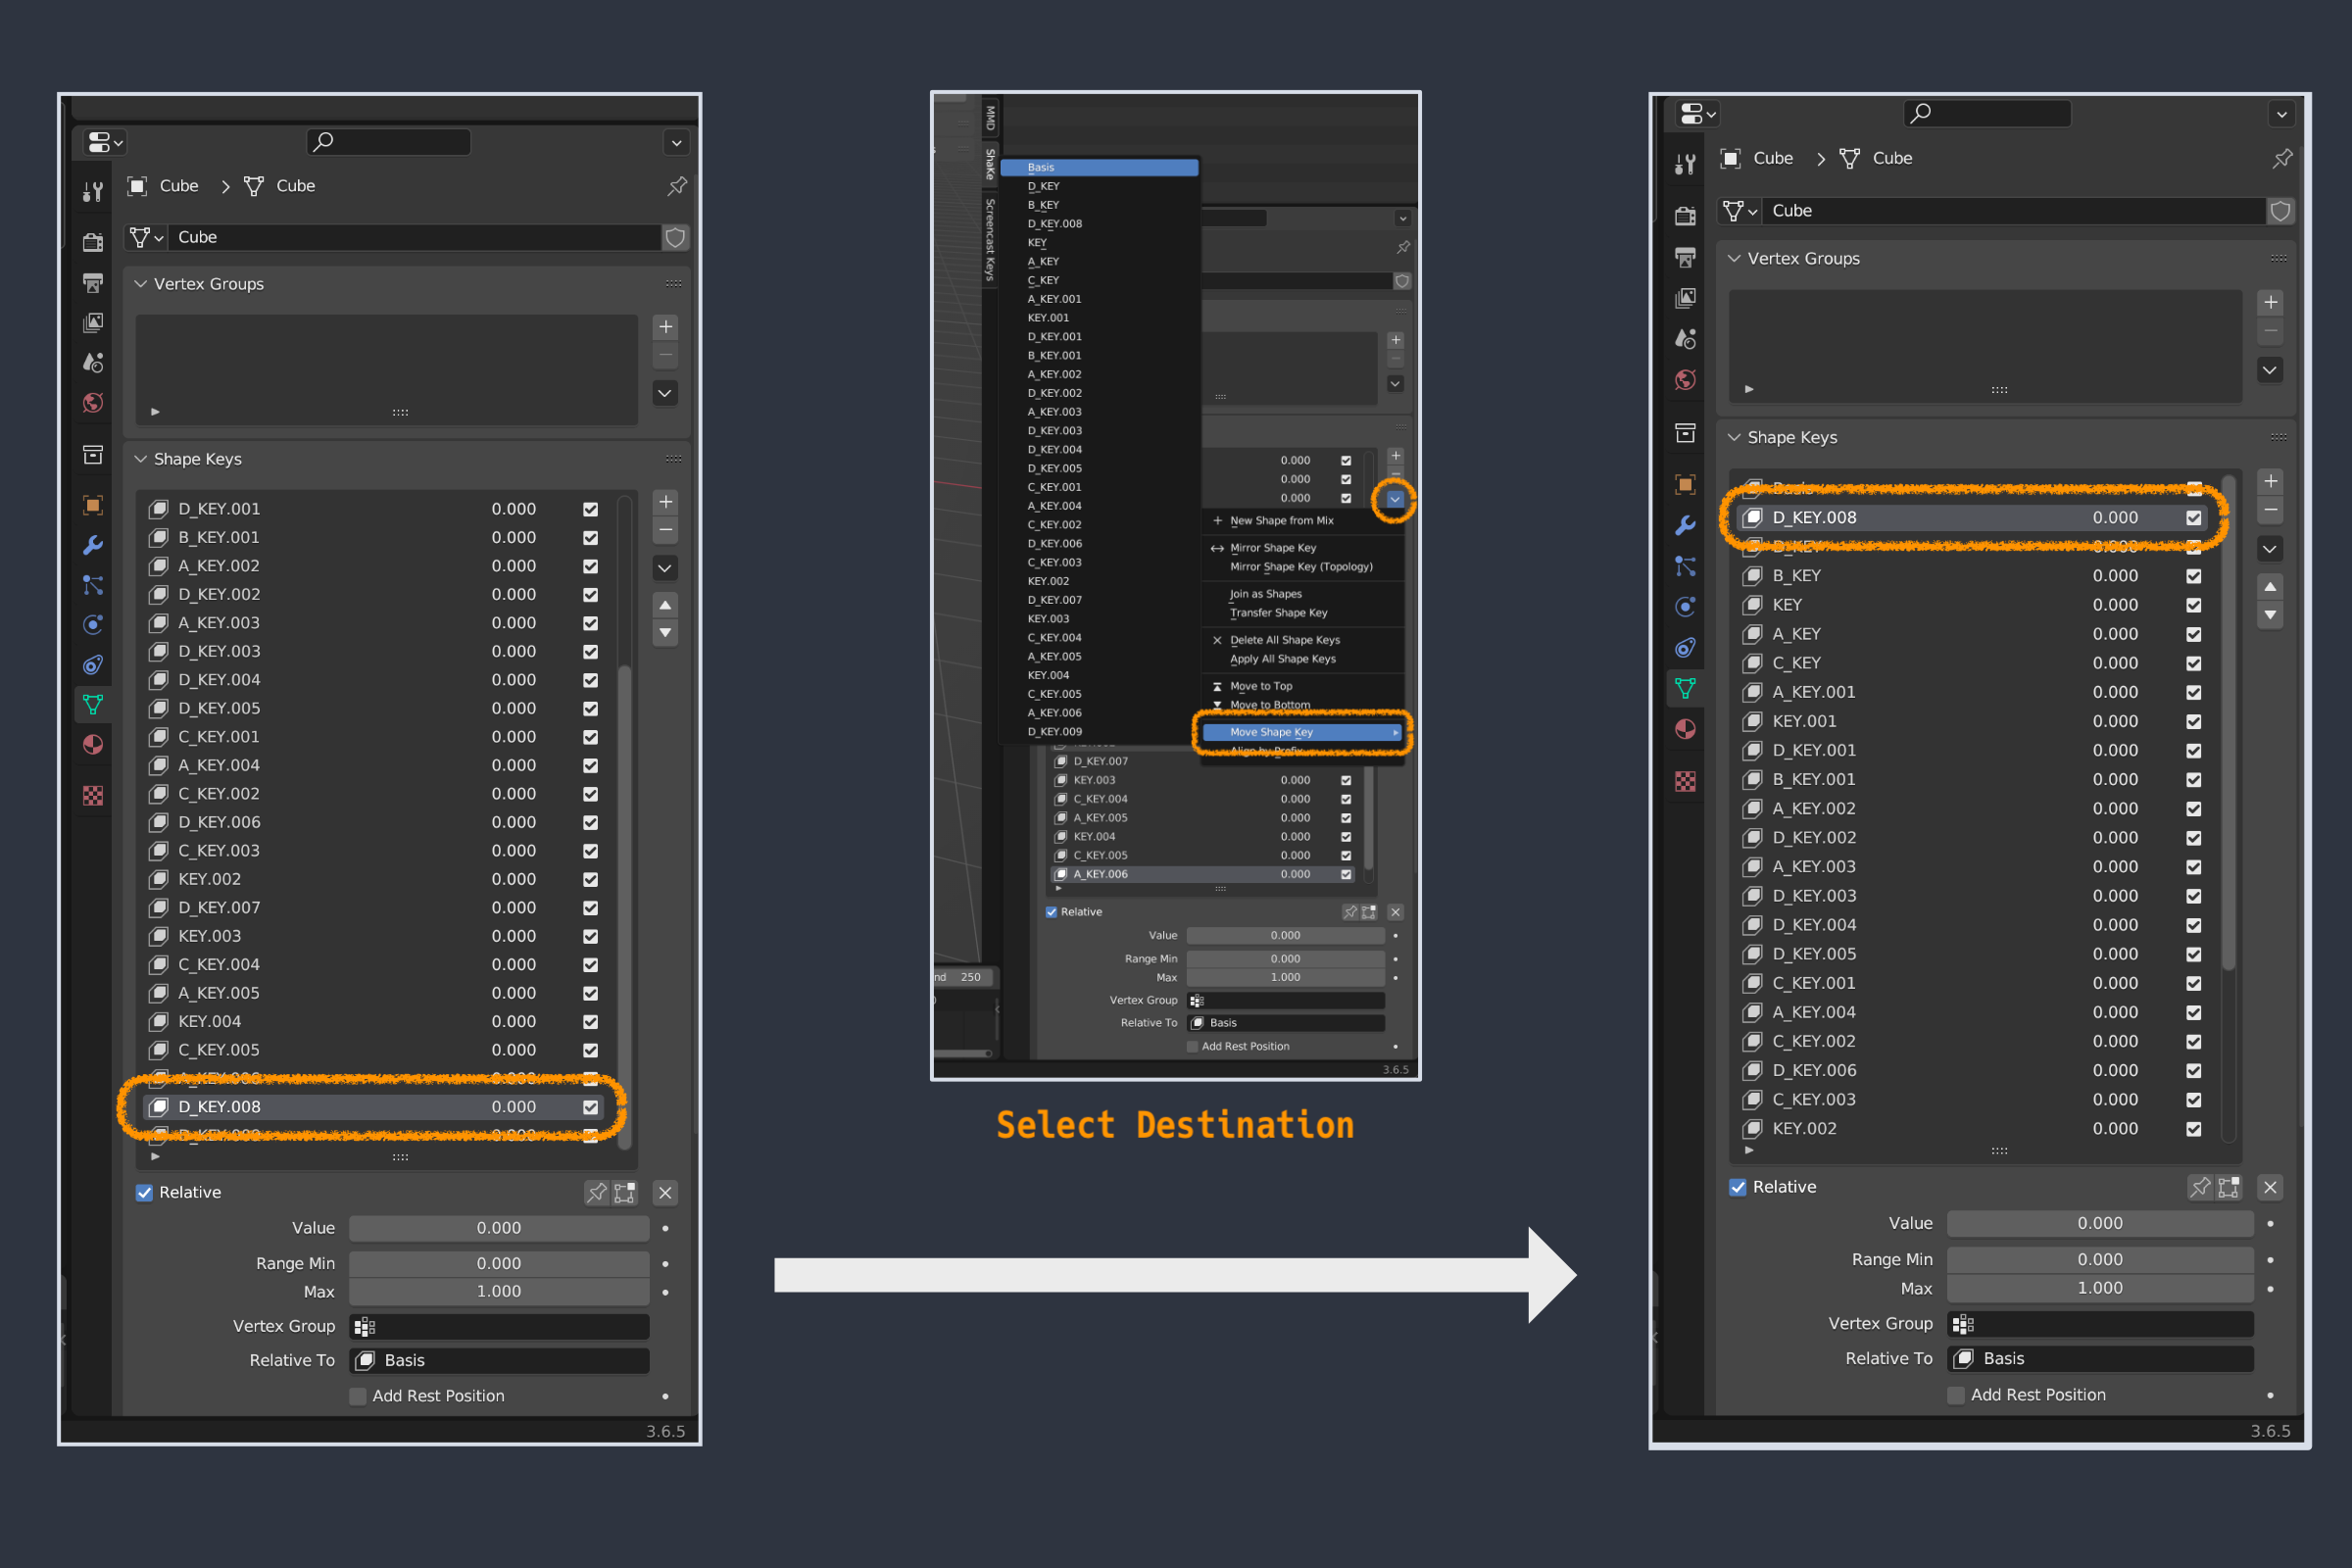
- Move active Shape Key to any position on the list
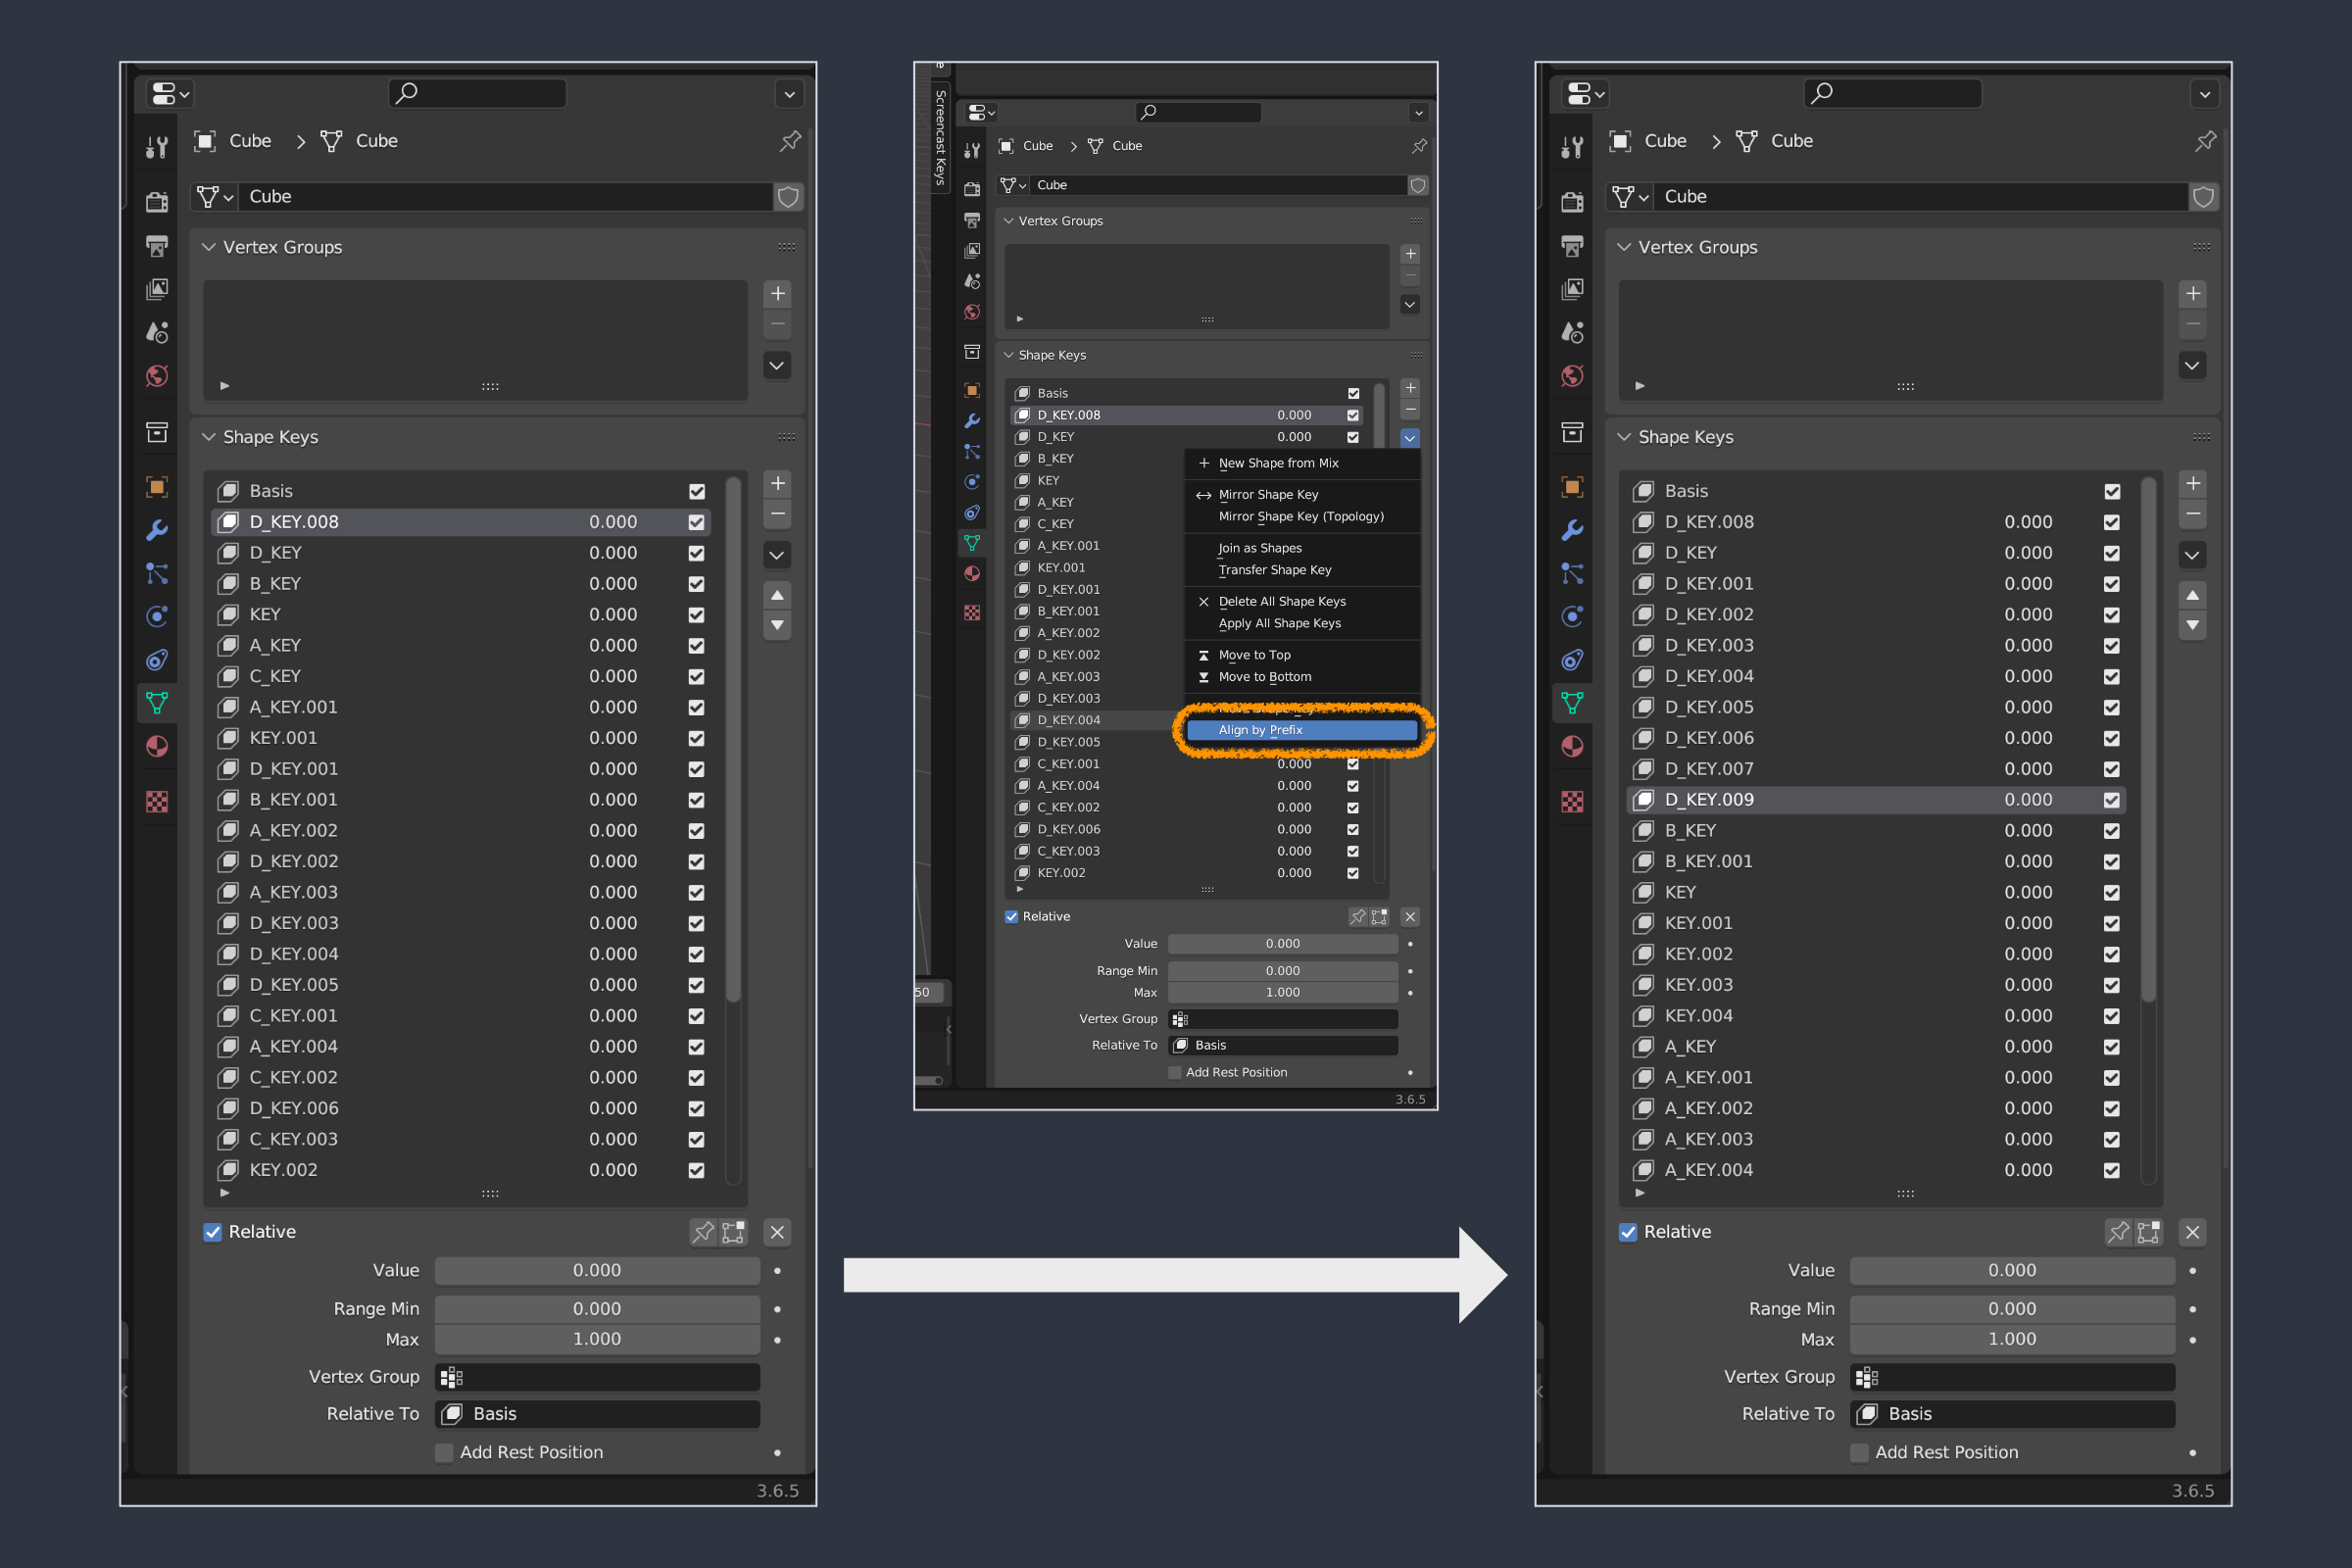
- Align based on Prefix (based on runtime order, not AtoZ)
- Sort by Prefix
- Transcribe Shape Keys
Usage
Tested on: bpgrip v2.0 / Blender 3.6.5, 4.0.0
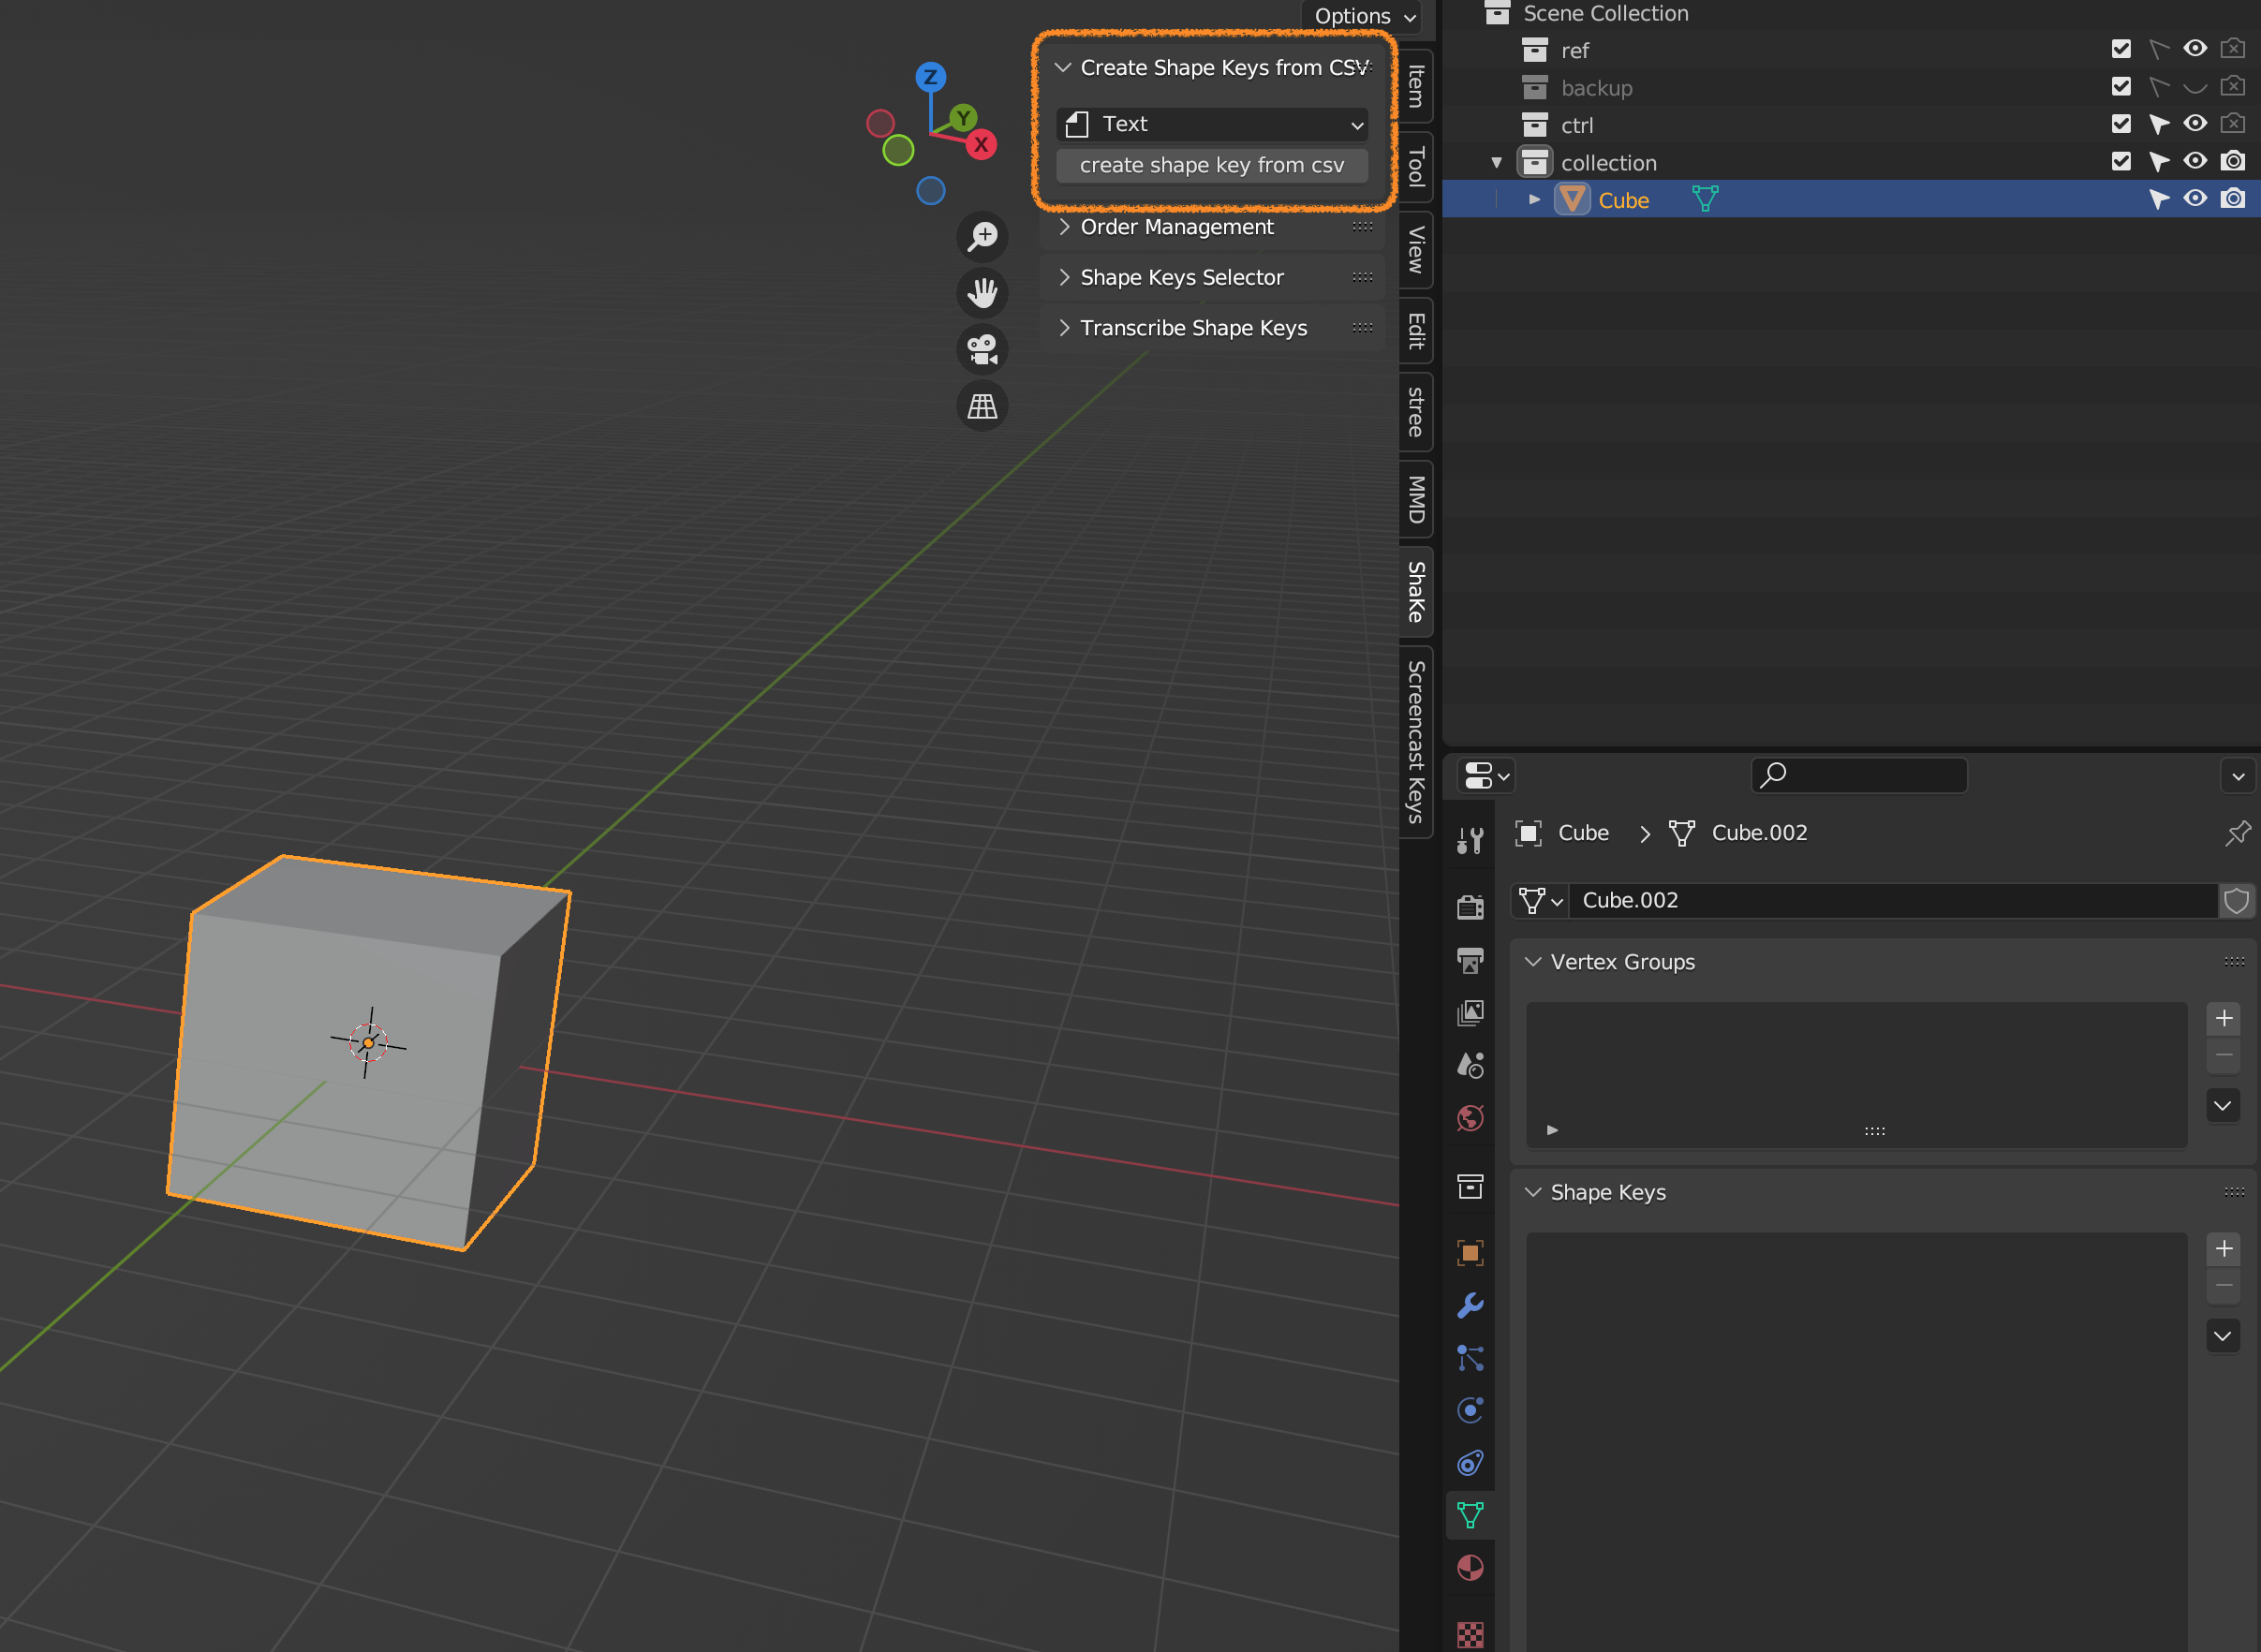
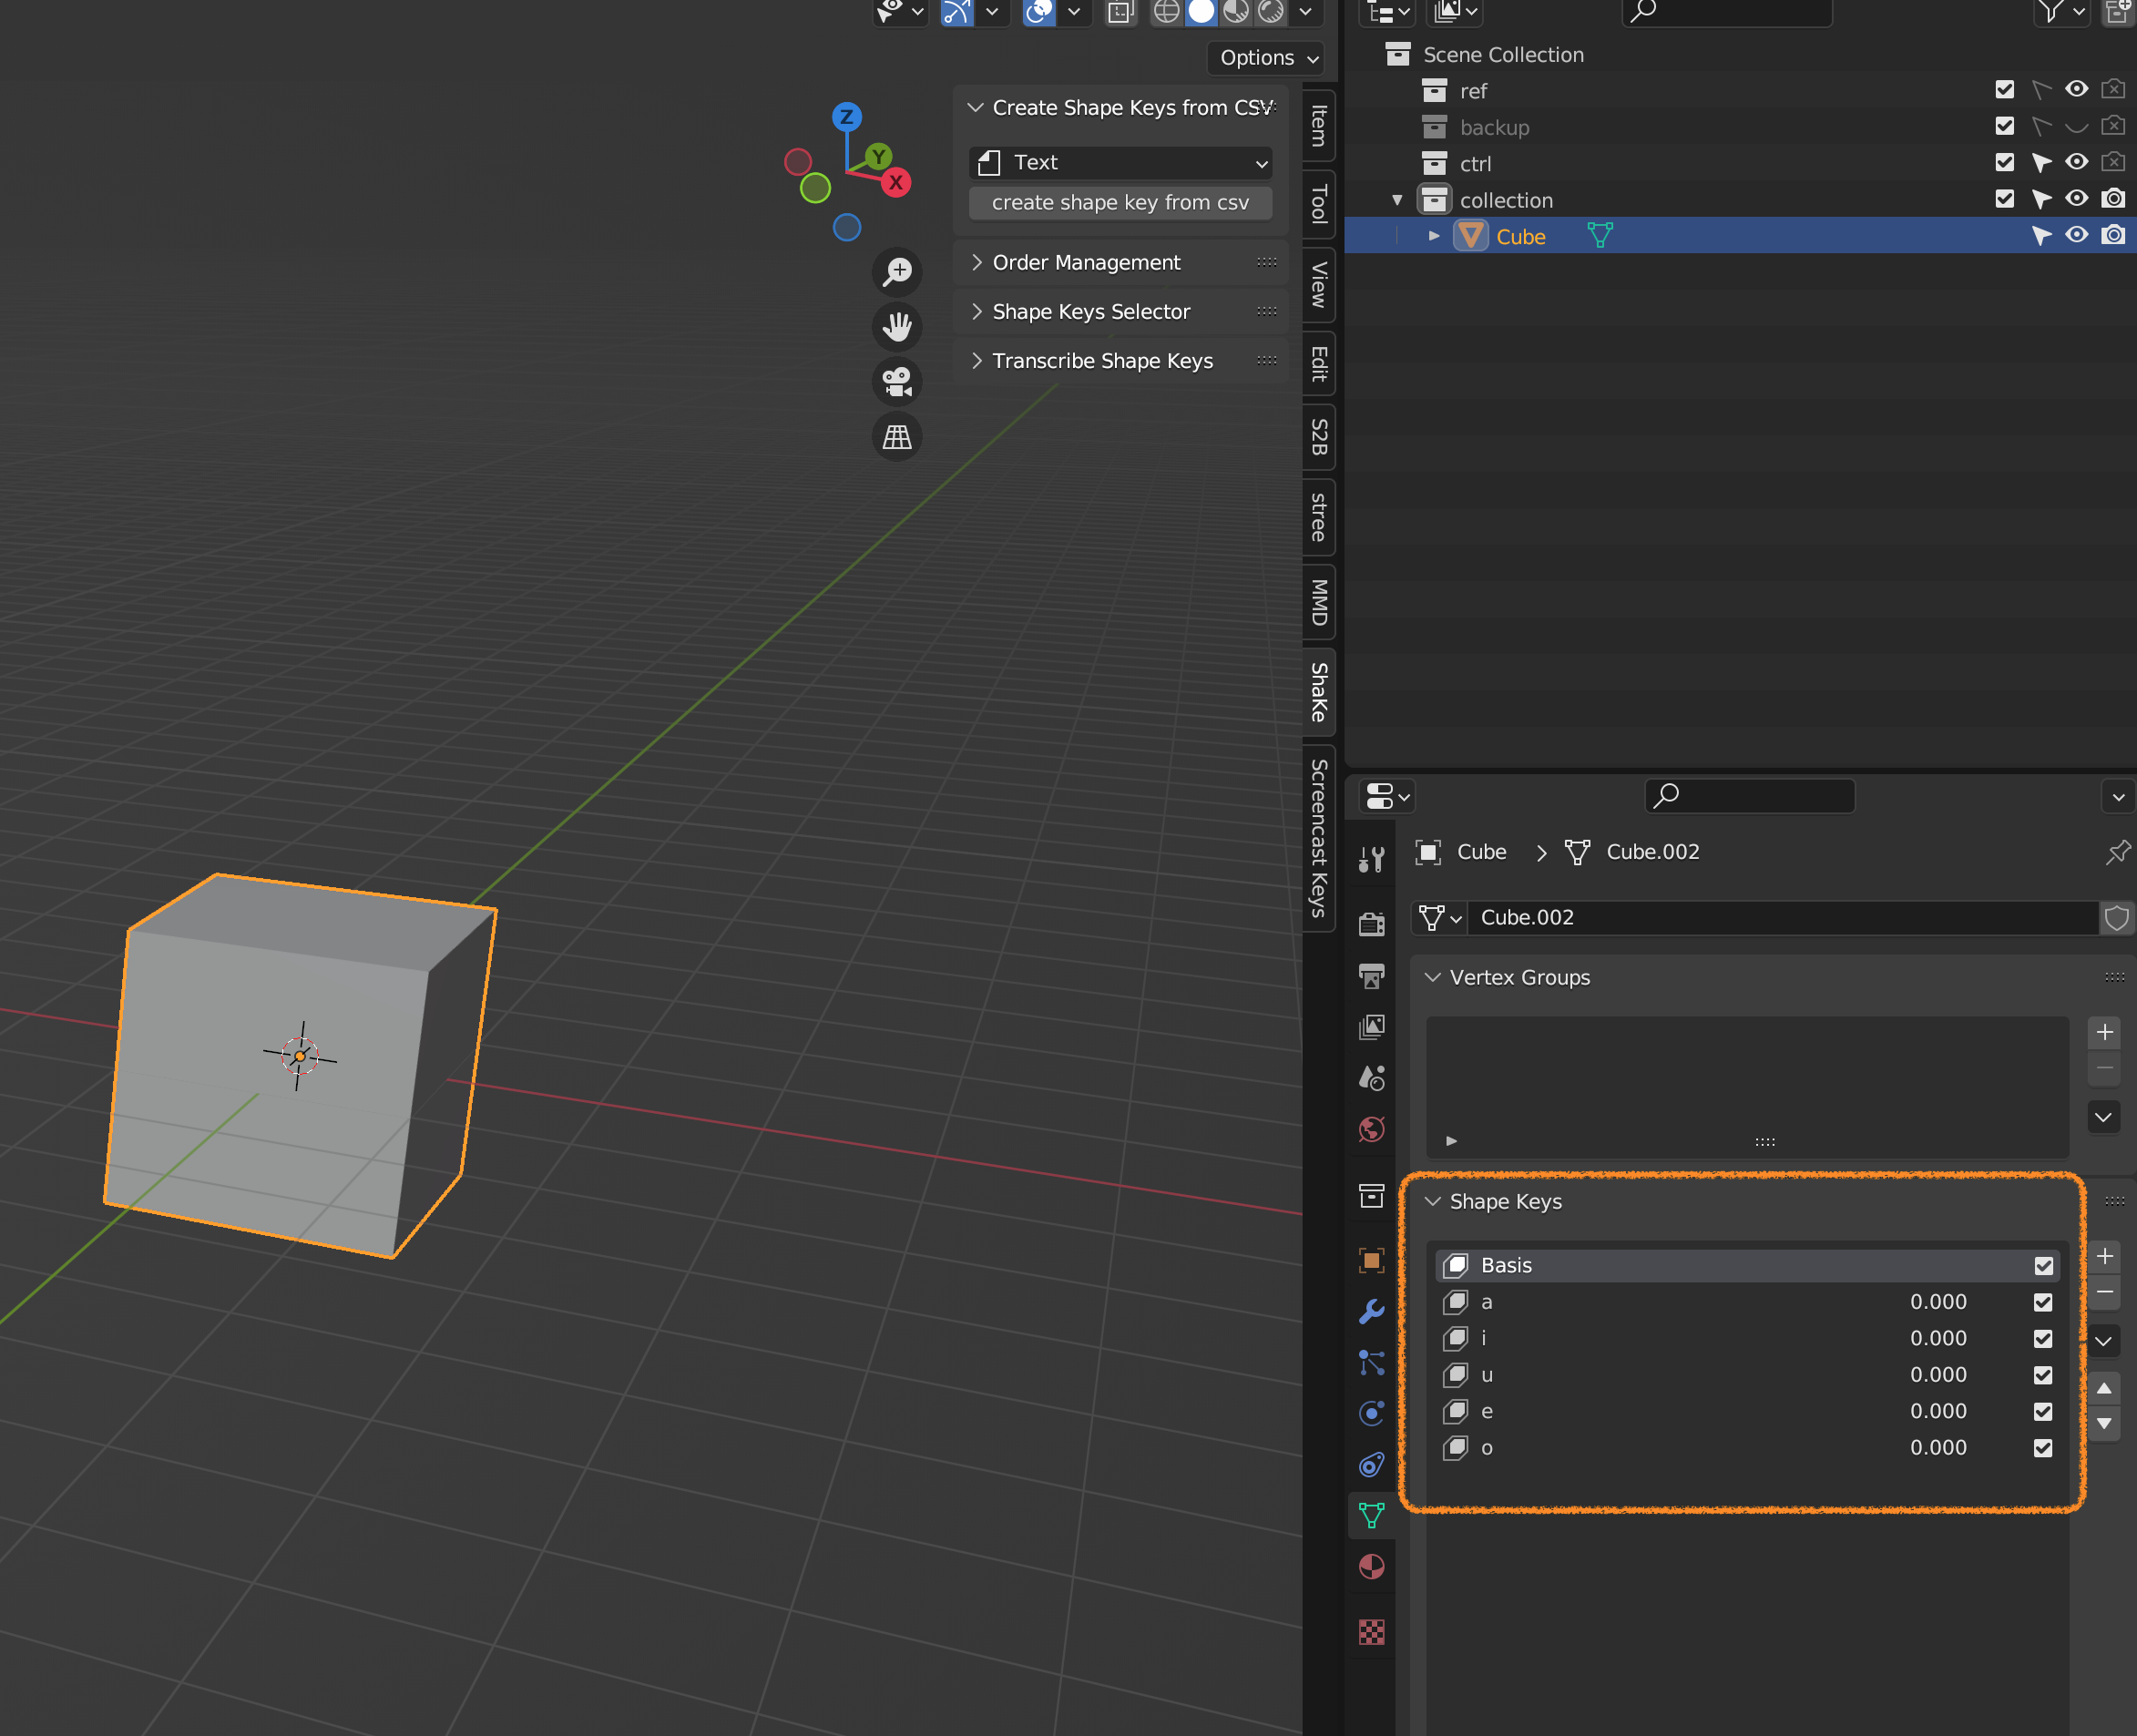
Create Shape Keys from CSV
- Load a list of Shape Keys you want to create in your Blender project from CSV.
- Delimiters:
line break (LF or CR+LF)and,.- You can also create them from the Scripting Tab.
- Open
Create Shape Keys from CSVin theShaKearea of the 3D View. - Select the CSV file from the dropdown menu.
- Choose the object to create Shape Keys for and press
create shape keys from csv.
Move active Shape Key to any position on the list
- Select an object and make it active.
- Choose the Shape Key you want to move and hover over
Move Shape Keyin the right-click menu. - The active Shape Key will move below the selected one in the list.
Align based on Prefix (based on runtime order, not AtoZ)
- Select an object and make it active.
- Press Align by Prefix in the right-click menu to sort by each prefix.
- It sorts based on the order of prefix existence, not AtoZ.
Sort by Prefix
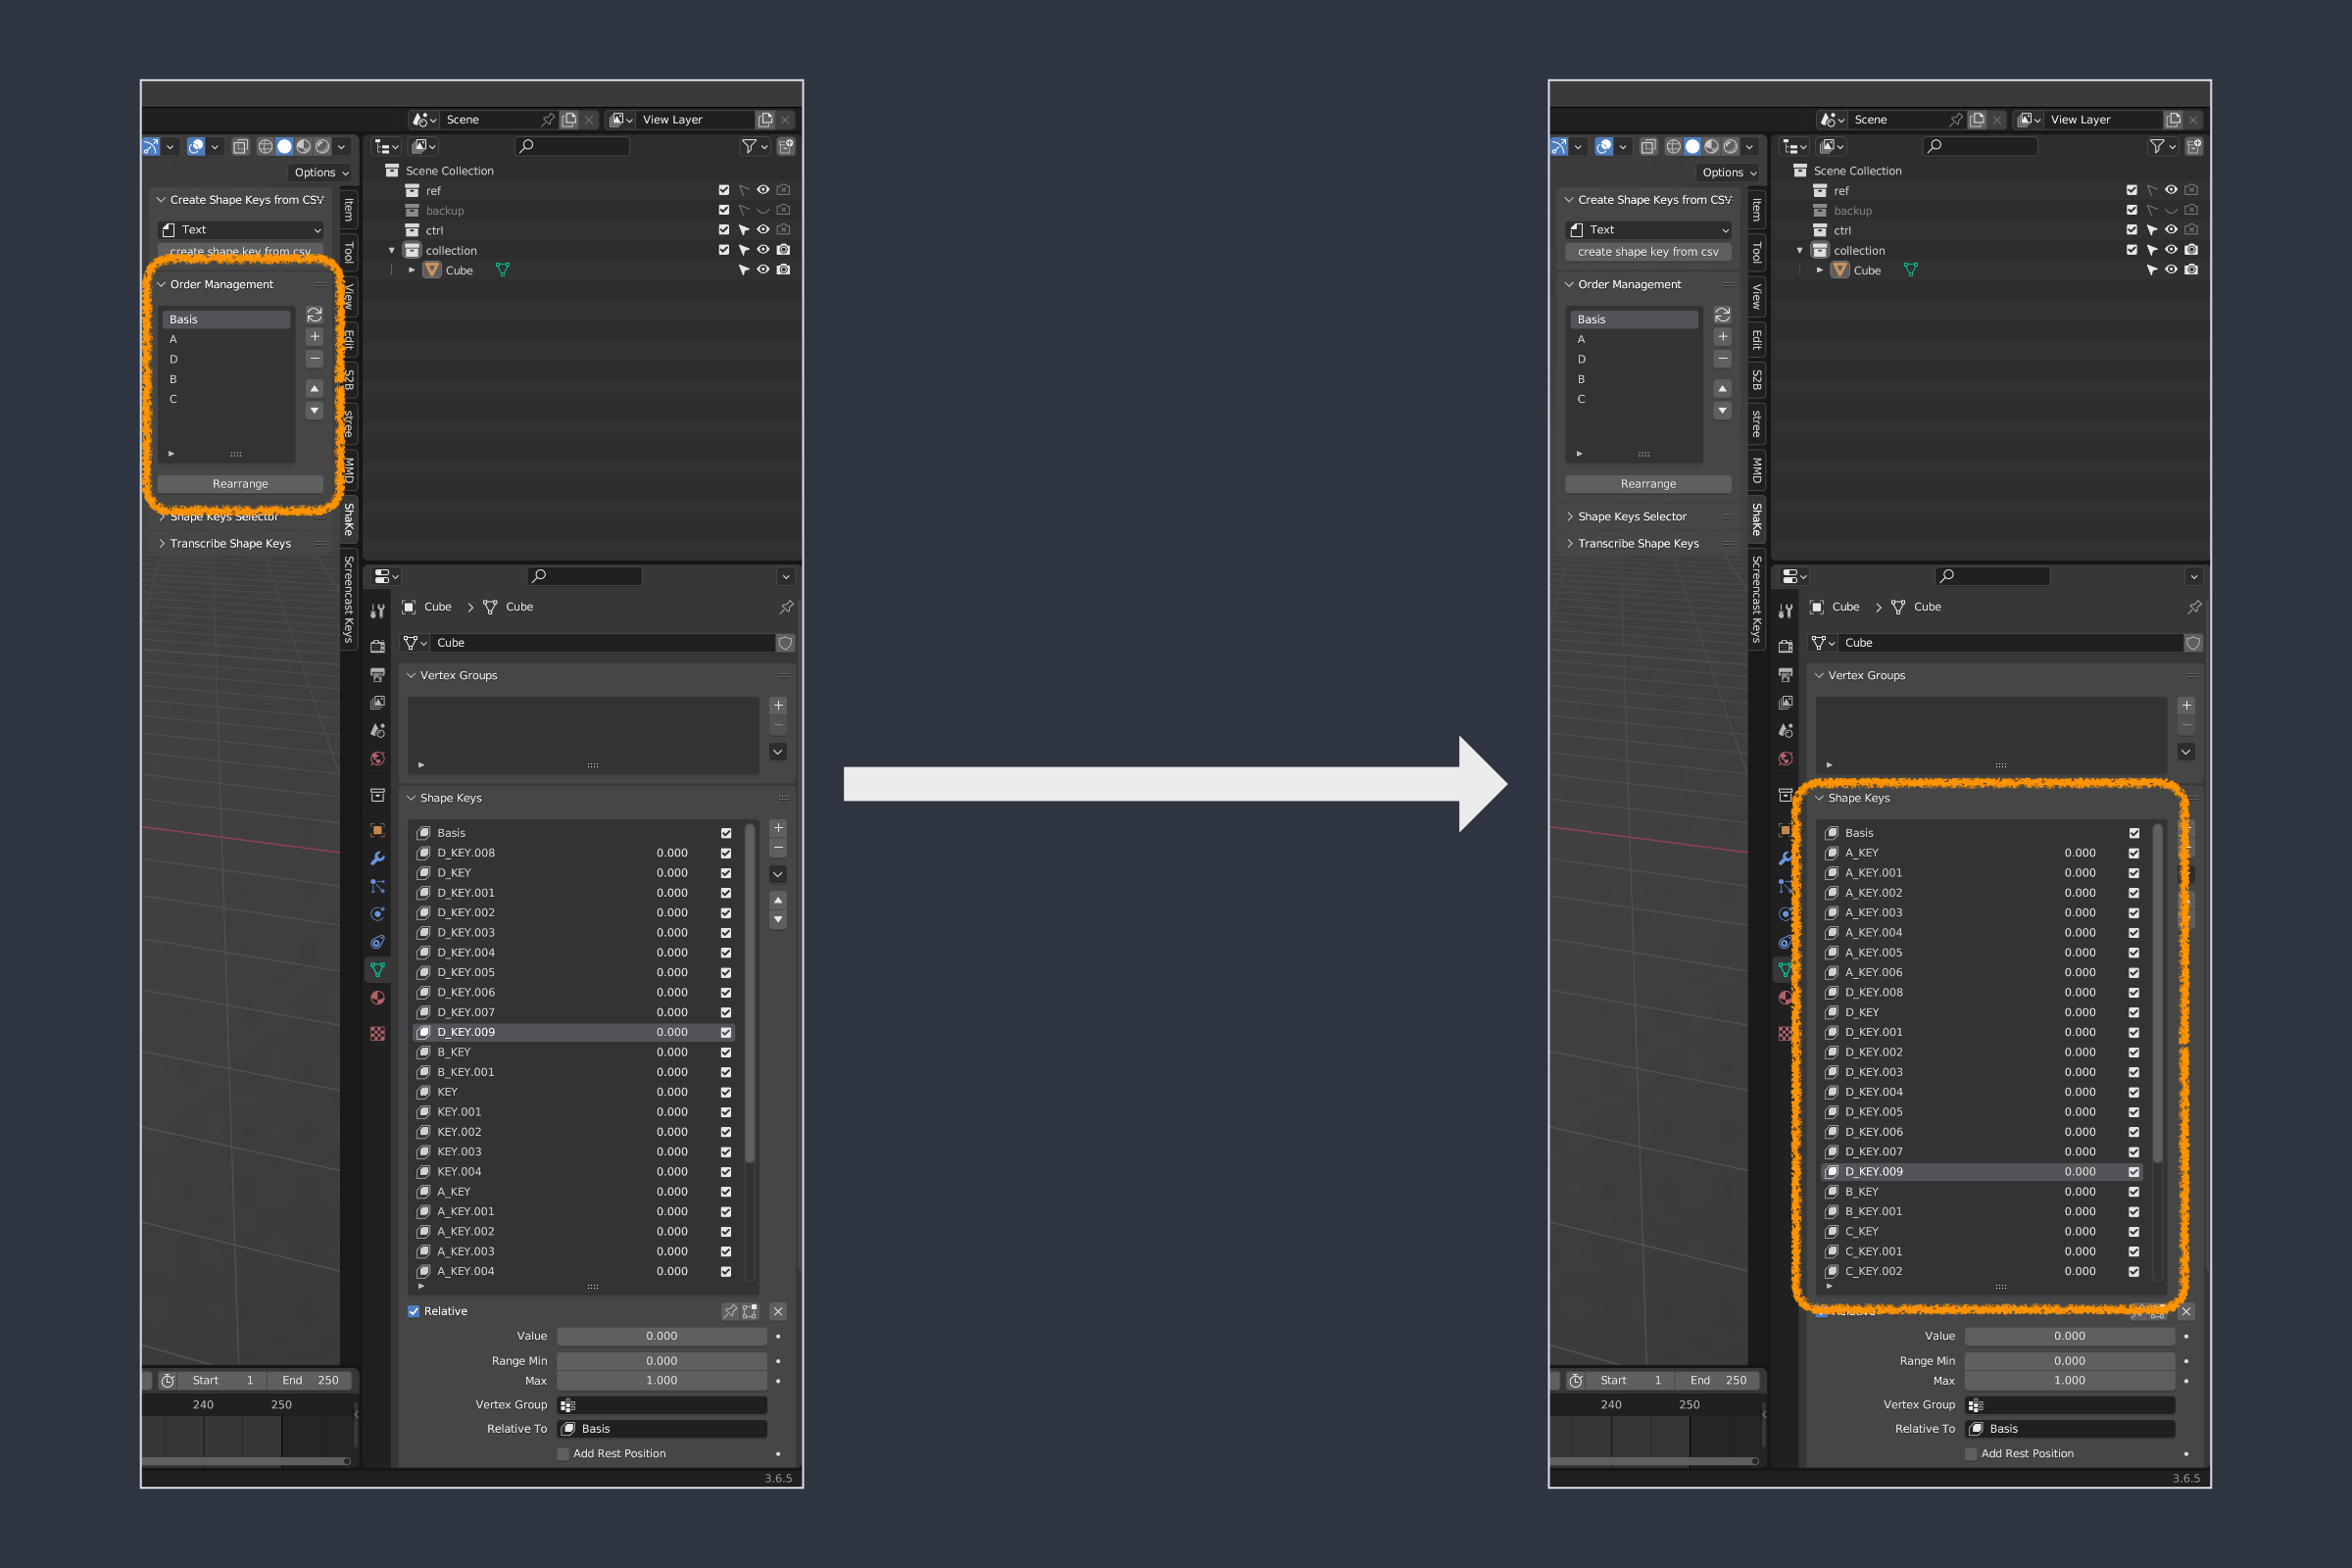
- Open Order Management in the
ShaKearea of the3D View. - Create a list of prefixes from the panel’s right button.
- Click the arrow icon to automatically retrieve information from the active object (be careful, as it overwrites).
- Manual creation is also possible with the
+icon. - Supports multi-level prefixes like
MAIN_sub_, determined by the longest match from the beginning.
- Press Rearrange, and Shape Keys will be sorted according to the list order.
- Since it looks for a match from the beginning, the delimiter (
_) is not mandatory.- Example:
KmatchesKey~.
- Example:
- Since it looks for a match from the beginning, the delimiter (
Transcribe Shape Keys
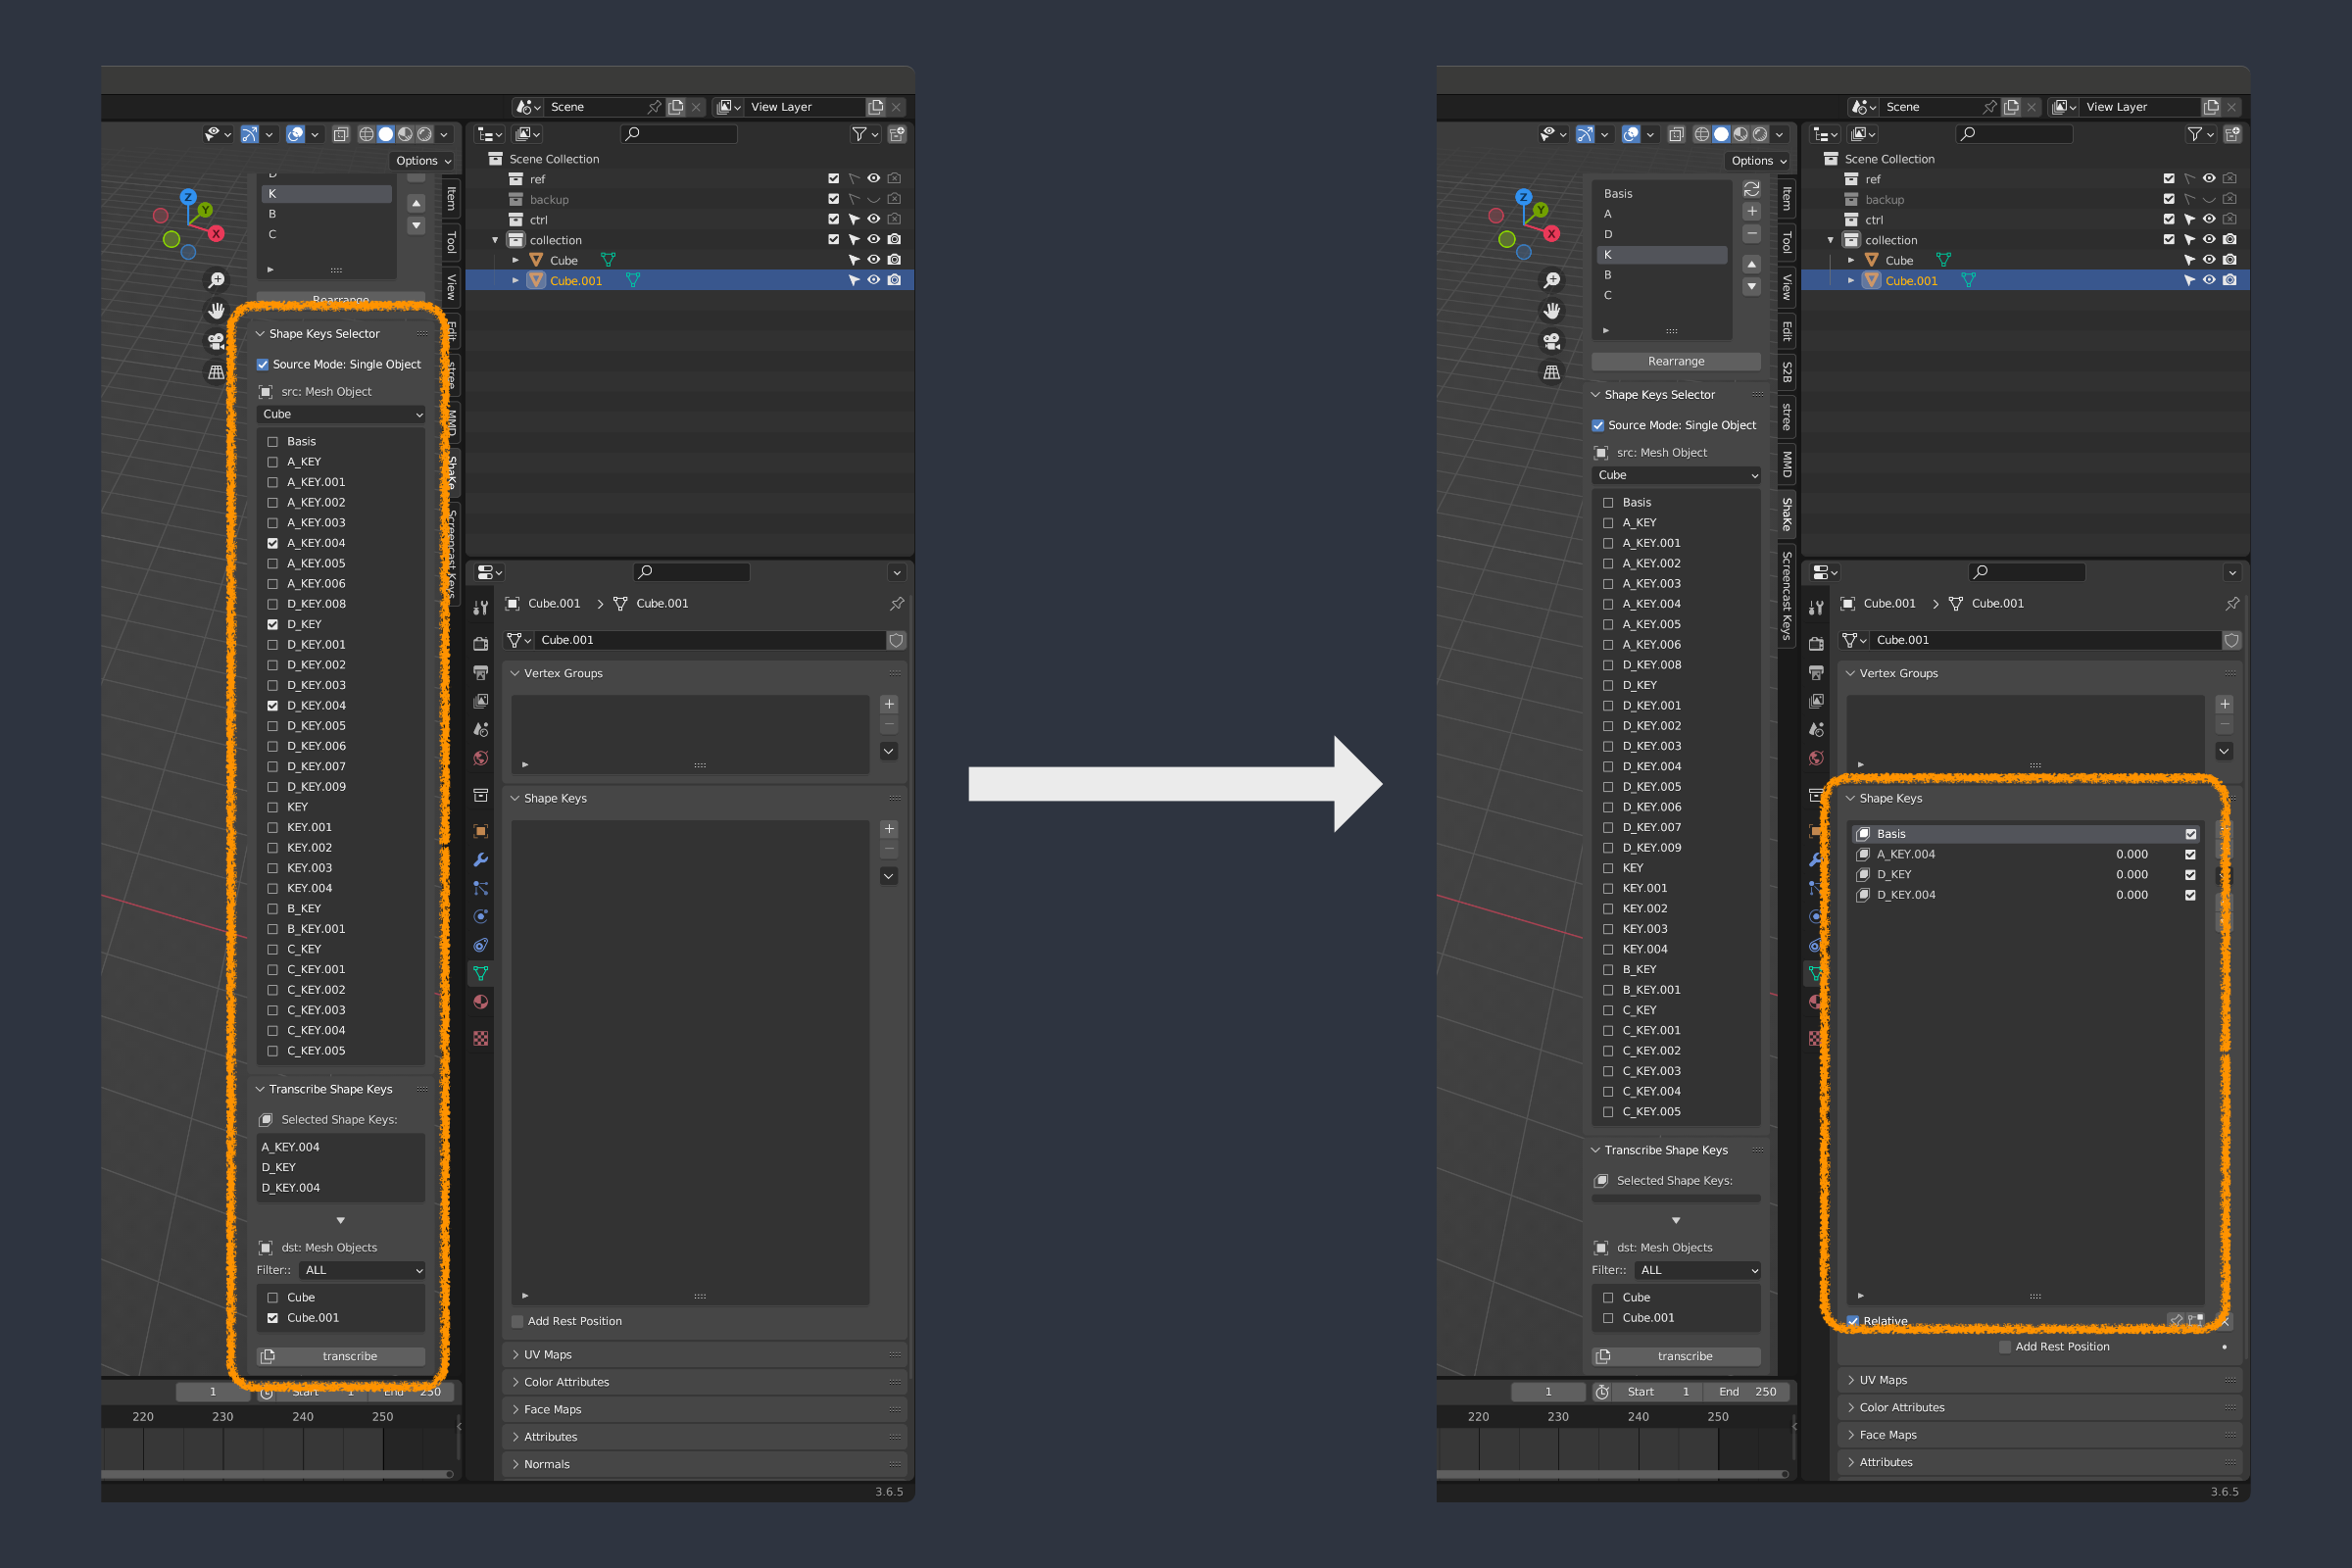
- Open
Shape Keys SelectorandTranscribe Shape Keysin theShaKearea of the 3D View. - In
Shape Keys Selector, choose the Shape Keys you want to transcribe from either the project or the selected object. - In
Transcribe Shape Keys, select the object where you want to transcribe (create) the Shape Keys. - Press
transcribe, and the selected object will have the corresponding Shape Keys created.
stree
Main Features
- Backup objects to a separate collection
- Easily preview and restore backups
Usage
Not specified, as it is not intended for general use.